
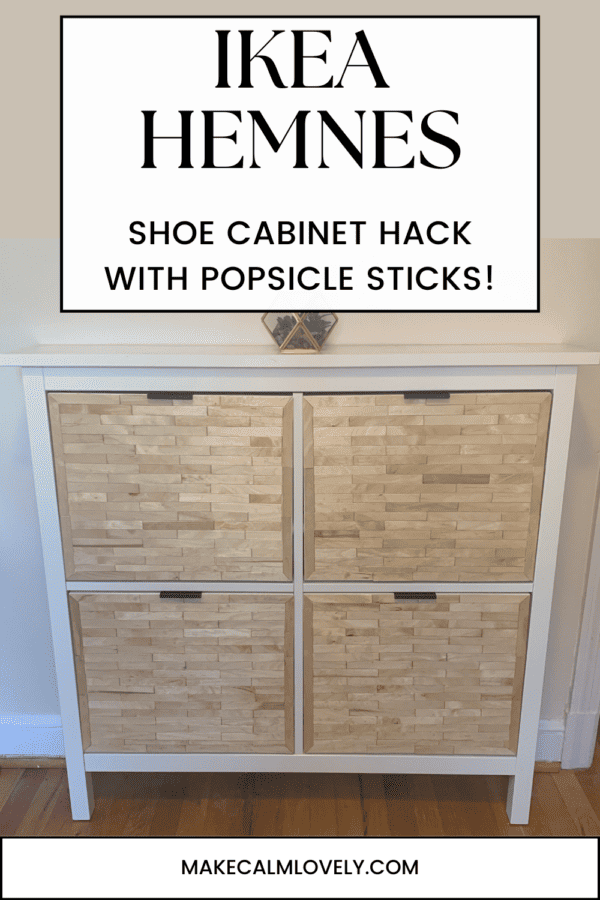
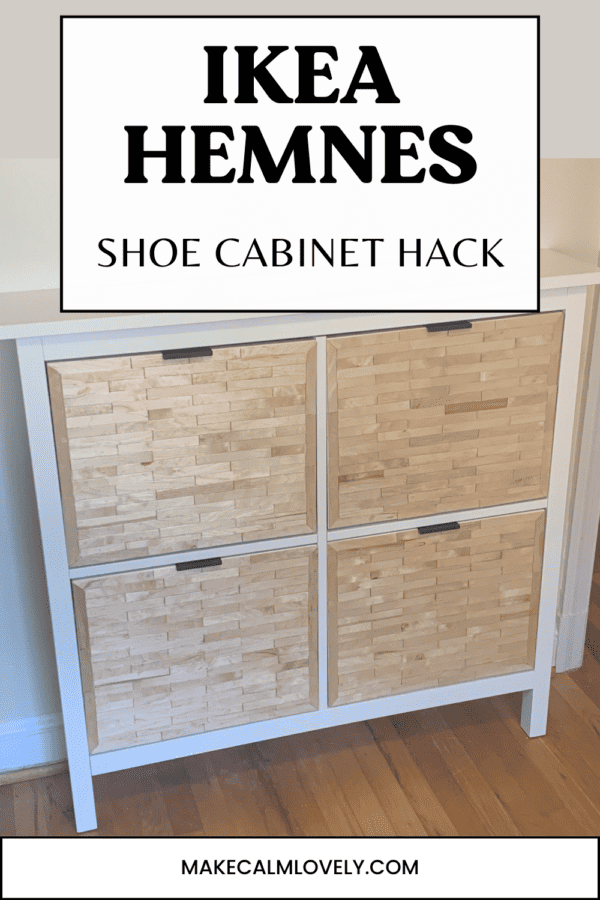
IKEA Hemnes Shoe Cabinet DIY Hack with Popsicle Sticks!
This beautiful DIY hack of the IKEA Hemnes shoe cabinet was created using popsicle sticks! See how to upgrade the cabinet here!
You may have seen many different IKEA Hemnes shoe cabinet hacks floating around the internet, Instagram, Tik Tok and more.
Checking out those hacks you will see so many amazing things that can be done when you DIY and ‘hack’ the Hemnes unit.
The Hemnes unit is so easy and fun to hack because it is a stylish and useful design, but is also very minimal in its appearance.
Left on its own the shoe cabinet is pretty enough (in that minimal Scandi way), but it just begs to be hacked, upgraded, and made better.
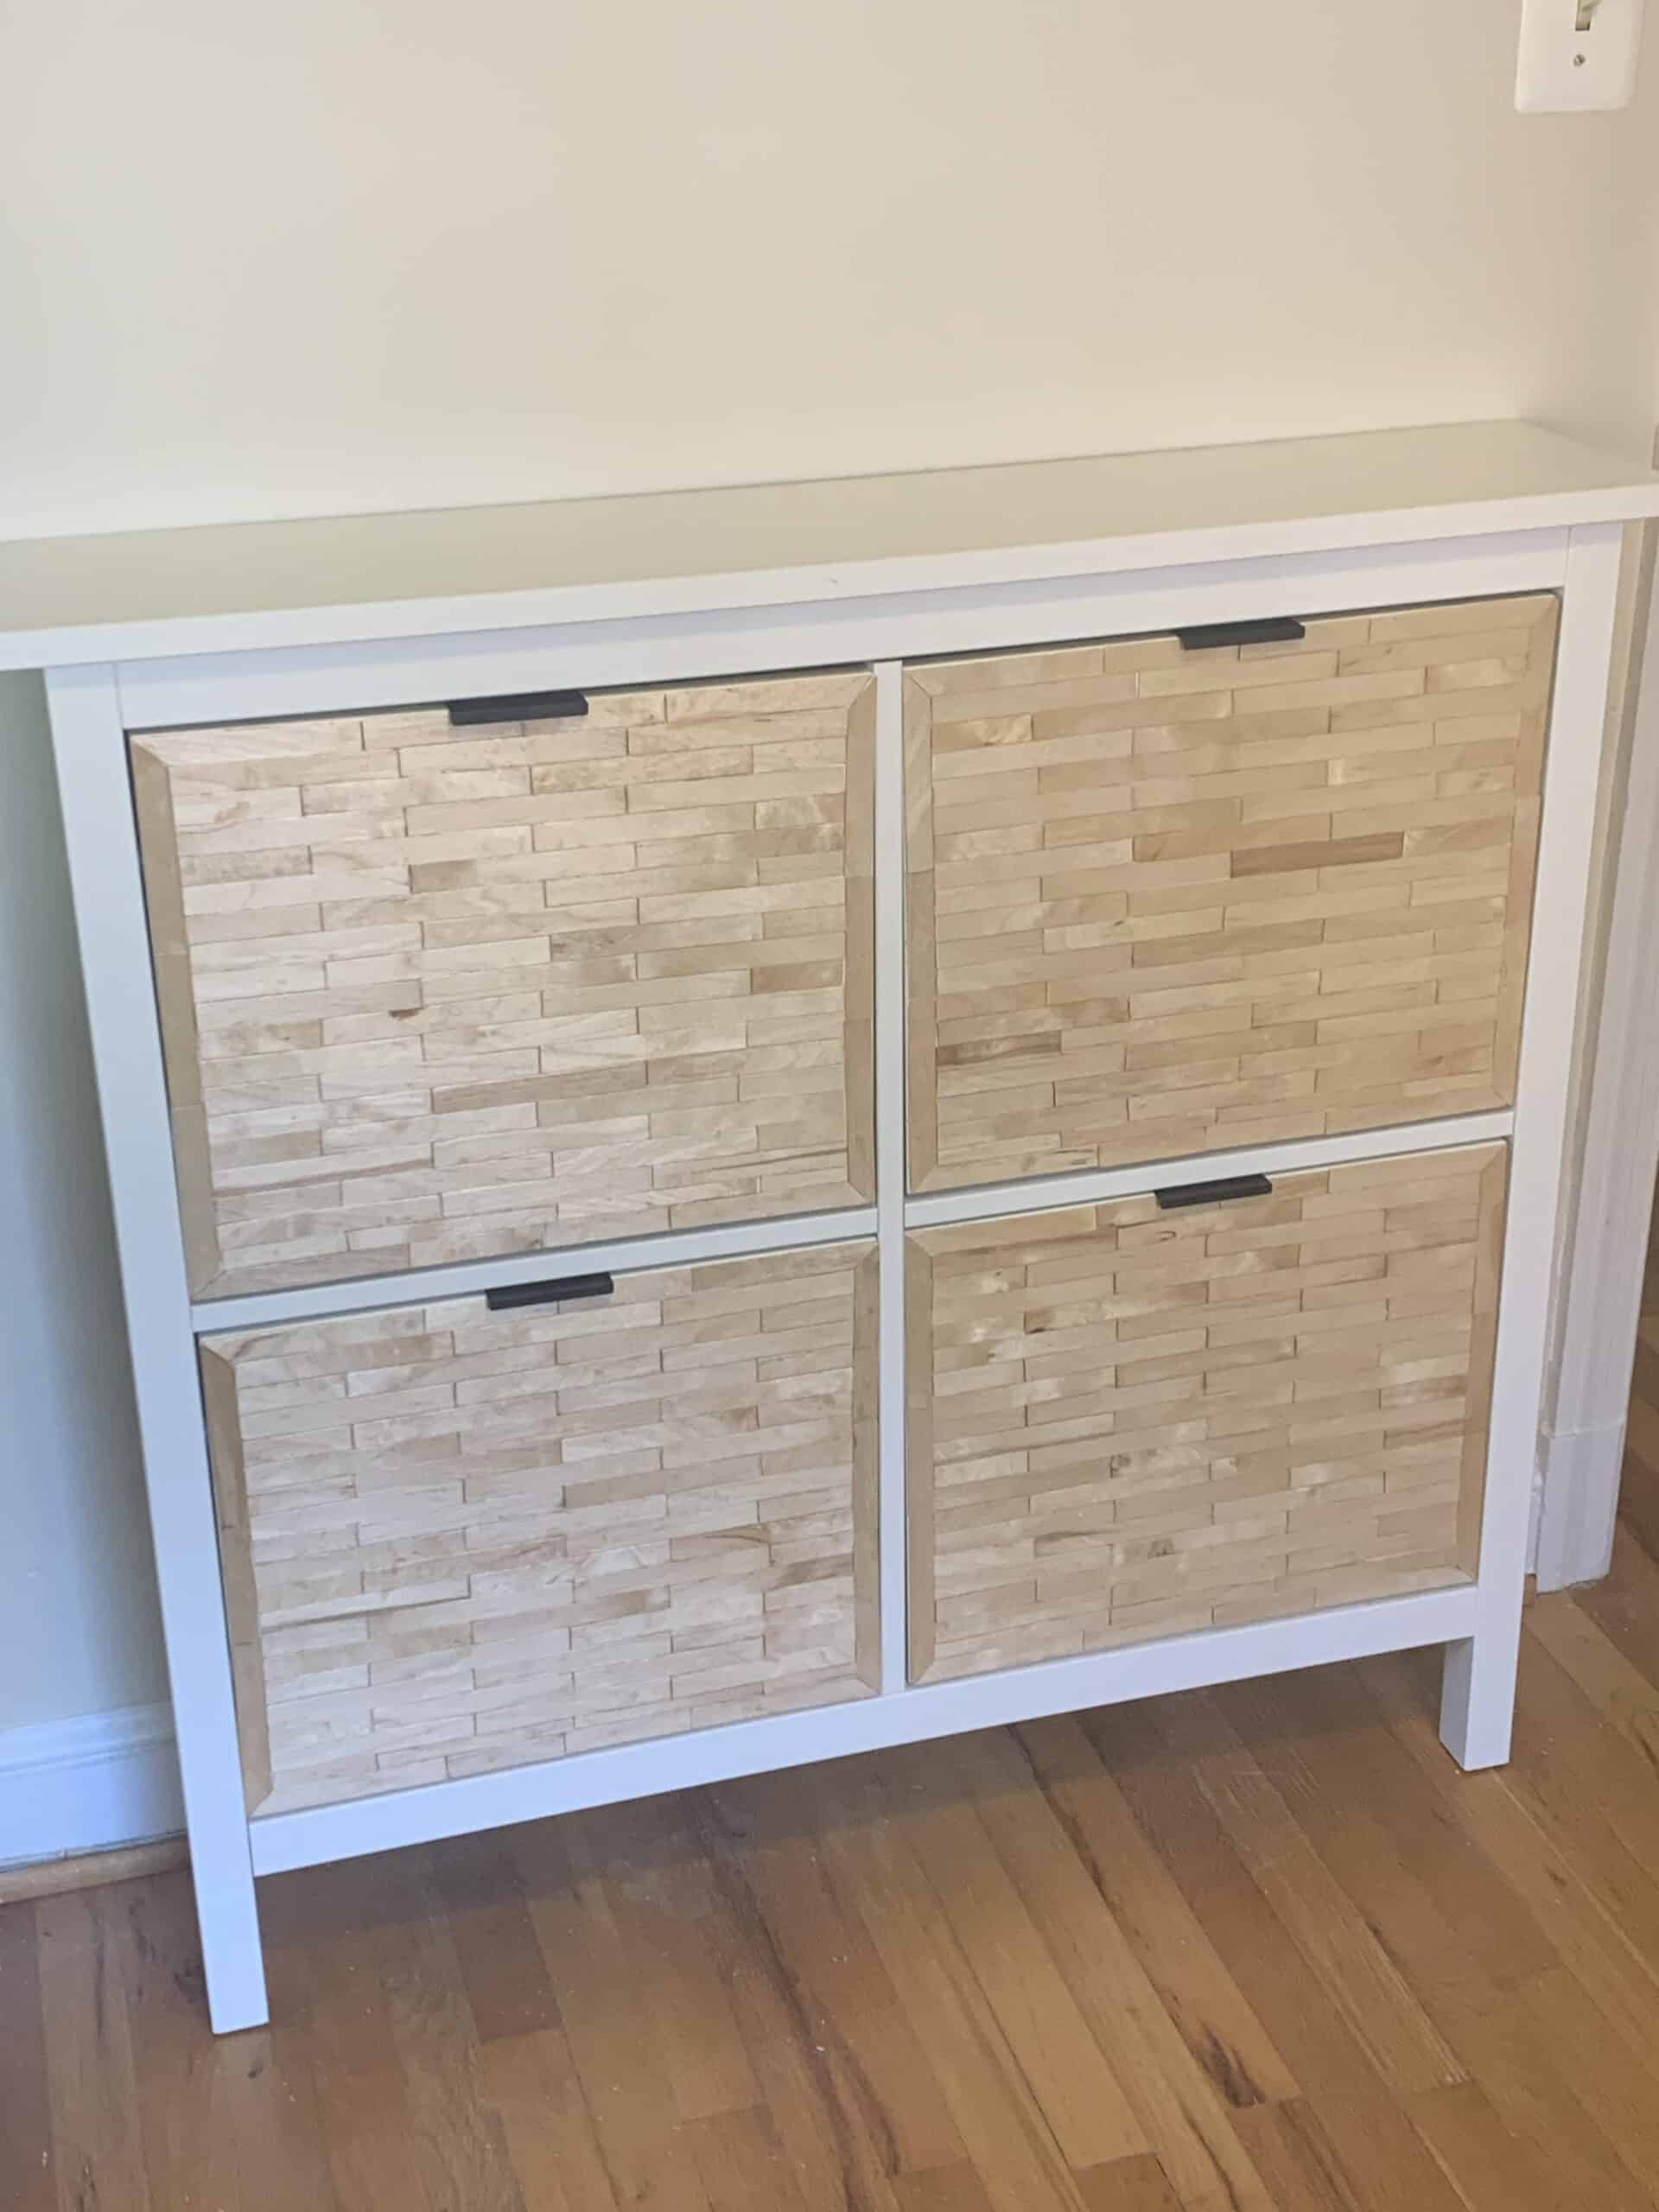
I hacked this IKEA Hemnes shoe cabinet using popsicle sticks to create a lovely design on the drawer fronts. You can read all about how to do the hack and create your own here!
This post contains affiliate links. This means that if you click on a link in this post and make a purchase via that link I may receive a small commission, at absolutely no additional cost to you.
All the other Hemnes shoe cabinet hacks I have come across are gorgeous and stylish. You can see a selection of them here.
But I wanted to create something a little different that nobody else had done (to my knowledge).
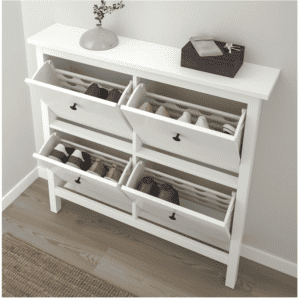
The Hemnes cabinet is a basic white or black shoe cabinet. It has 4 drawers that open up at the front, where shoes (or anything else you choose) can be inserted.
Shoes are one of our home’s huge problems when it comes to keeping a home tidy and organized. So a shoe cabinet is a great piece of furniture to have.
The entire Hemnes cabinet itself could be painted and the drawer pulls changed out for a minimal hack.
But I felt that the drawer fronts themselves have a lot of potential to be changed completely.
So this IKEA Hemnes hack completely changes the front of all the drawers in the unit, and really upgrades the entire look of the cabinet.
I researched and planned the best way to hack this particular shoe cabinet. I think the end result looks so much more up-market and stylish!
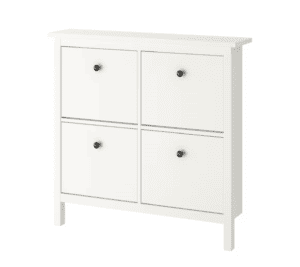
What is the IKEA Hemnes Shoe Cabinet?
The IKEA Hemnes shoe cabinet is a white or black basic cabinet that holds shoes (or anything else you would like to store in it).
There are 2 different Hemnes shoe cabinets – one with 2 compartments and one with 4 compartments. For this hack you need the cabinet with 4 compartments.
Supplies Needed for the IKEA Hemnes Shoe Cabinet Hack
IKEA Hemnes Shoe Cabinet with 4 Compartments
Scissors
Sanding sheets or electric sander
Adjustable Triangle (optional)
Finger Edge Pull Handles (or other handles of your choice)
How to Hack the IKEA Hemnes Shoe Cabinet
For this hack you are going to be working on one drawer at a time, until you have done all four of the drawers.
When doing this hack you may want to prepare and cut down some popsicle sticks ahead of time (see step six below for details on how to do this).

Step One – Clean down the cabinet
The very first thing you need to do when hacking the Hemnes cabinet is to wipe down the exterior of the cabinet entirely with a damp cloth.
Step Two – Remove all the drawers from the cabinet
Remove all the drawers from the cabinet. This is very easy to do – just open them and pull them up and out. Set them aside to work on one by one.
Step Three – Remove the knobs from each drawer
Taking one drawer at a time, remove the knob pull from the front of the drawer. This is very easy to do – they just twist out.
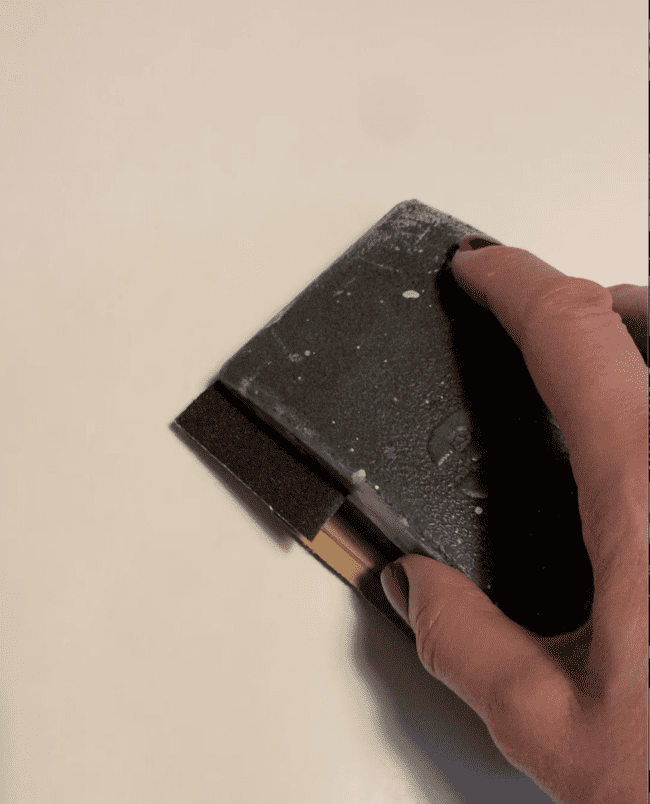
Step Four – Sand down the drawer front
Using sandpaper, sand down the front of the drawer completely. You do not need to go overboard on this – just a light sanding will suffice. This will prepare the drawer front to hold the glue and wooden sticks better.
Step Five – Wipe over the drawer front to remove dust & debris
Wipe over the drawer front with a damp cloth to remove all traces of sanding and dust.
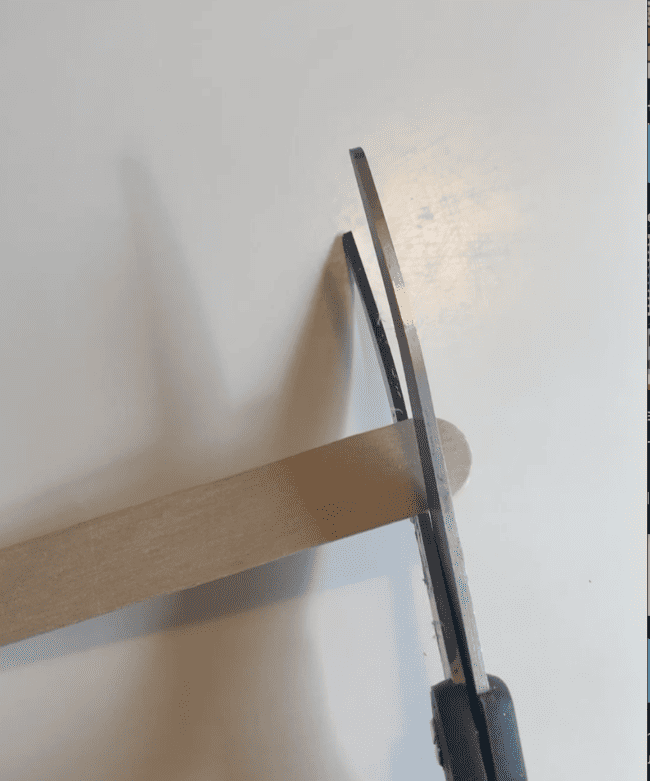
Step Six – Prepare the popsicle sticks
Prepare the popsicle sticks. The popsicle sticks have rounded ends at both ends. As closely as you can cut off the round end of each stick. Try to keep as much length of the popsicle stick as possible when doing this.
Note on measuring and cutting the popsicle sticks – I cut down numerous popsicle sticks first of all, by just snipping off the rounded ends.
When it came to doing the border with the sticks and filling in the design, I would measure what I needed and then cut each popsicle stick individually. But the rounded end has already been cut off to make this part easier.
Step Seven – Create the exterior border
You are first going to create the exterior border on the drawer front. You will be placing popsicle sticks all around the outer border.
You will need to create the corner pieces first, so that all four corners have a corner piece to form the basis, you then fill in all the other outer border pieces after this.
In order to create those corner pieces you need to measure the popsicle sticks in the corner, then cut them so they slot completely together to form that corner piece. To do this you are going to be cutting a mitered corner.
Mitered Corners are when two edges meet at a 45 degree angle, creating a 90 degree corner.
I used an adjustable triangle to do this, as I found I got much cleaner mitered corners by measuring with this. You don’t need to use a triangle to do this, any way you can cut that gets a perfect 45 degree angle will work.
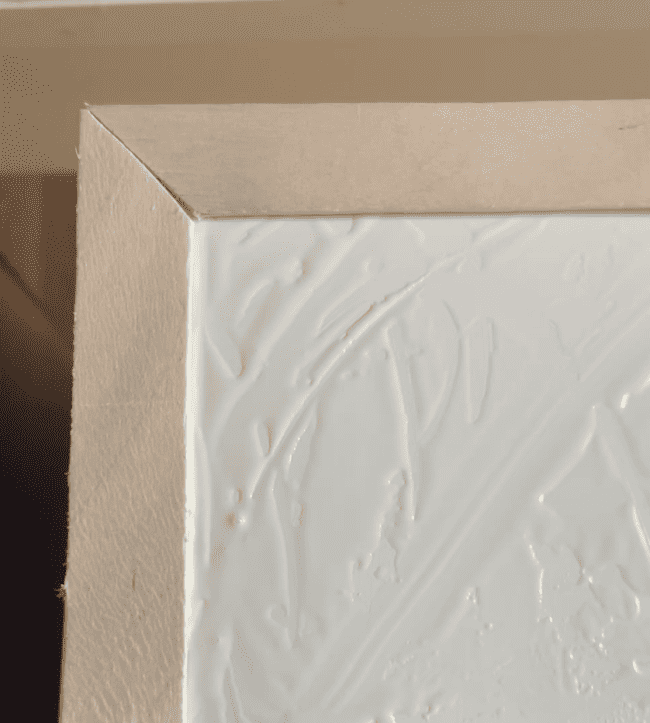
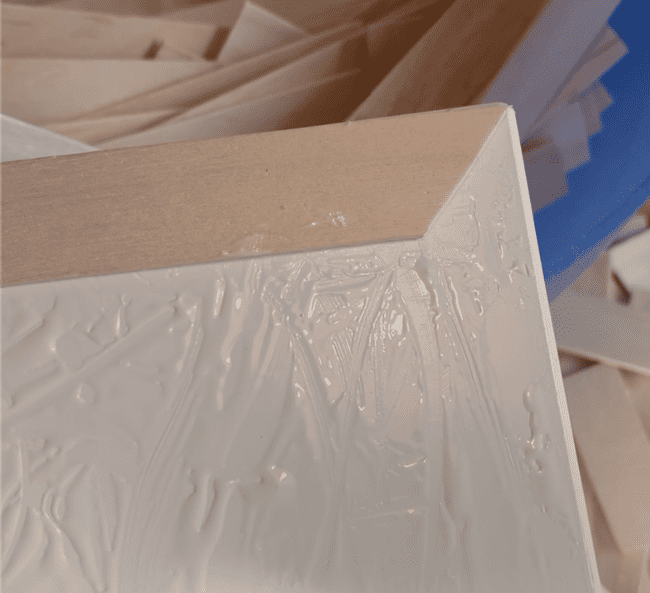
As you can see in the photo below, these are the corner pieces that will slot together. So you need to cut those popsicle sticks at an angle in order for them to sit well together.
You will be doing this for all four corners. Place glue onto the area of the drawer front that you will be sticking them on, and then place the sticks onto the drawer front, pushing them down so they stick well. When the glue is still wet it is easy to slot and move them into place.
Note: The photo below shows more glue than you will need at this stage – this is just showing you the corner clearly. Just use glue for now on the actual area that you are sticking the corner pieces to.
Step Eight – Place the rest of the border
Once you have placed all four mitered corners into place, you are ready to place the rest of the border onto the drawer front.
Measure out the lengths of popsicle sticks you will need for this.
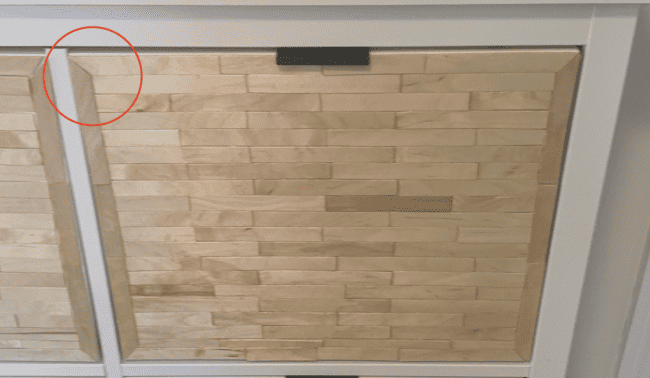
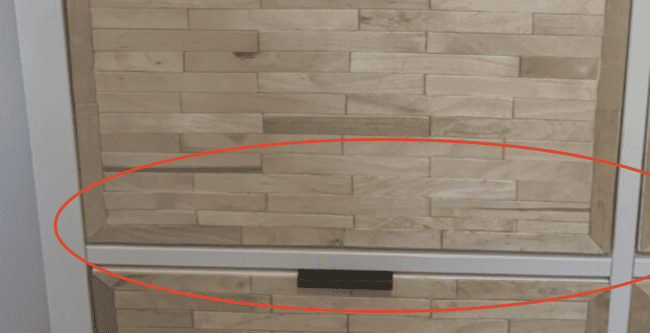
As you can see from the close-up of the drawer front above, the corner pieces are indicated by the red circle.
You will then fill in the rest of the border. I used 3 or 4 pieces for the rest of the border, cut to size (just place the popsicle stick on the drawer front to get an idea of the size needed to cut).
Both the left and right hand sides of the border were the same size popsicle stick, with a middle stick placed between them.
The photo above shows the border pieces and their sizes more clearly.
Step Nine – Place the rest of the design with the popsicle sticks
Once you have outlined the border of the drawer front, it is now time to lay all the other popsicle sticks into place.
Here is a close-up of the pattern used to fill in with popsicle sticks:
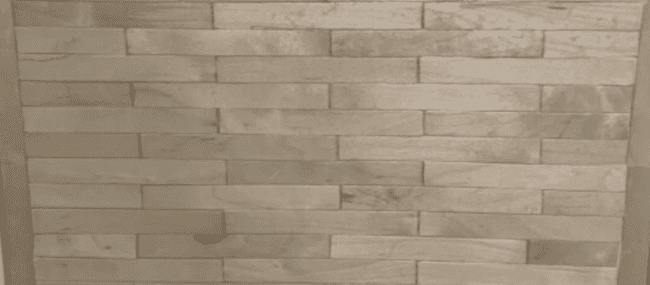
On the first line there are 3 equal length popsicle sticks. Then on the second line there are 4 popsicle sticks.
Then lines 1 and 2 are repeated until the entire pattern forms.
You can either put glue over the entire front of the drawer and then place each stick, or you can glue the area that you are placing the stick onto only.
I found it easier to place glue on the entire front to do this, so I didn’t then have to place glue on individual parts. But you should only do this if you are going to complete the entire drawer front at that time.
Complete the entire pattern from top to bottom.
Once you get to the bottom part you are going to find that there is a little less space than you need to complete the pattern.
The bottom row that you place of sticks, just above where the border has been pre-set is going to be too narrow for the next line of sticks.
Therefore you will have to get a little creative and cut down those popsicle sticks in width. The sticks are so easy to cut, just shave off some of the width so that you are inserting narrower popsicle sticks in that row.
Don’t worry – this will not affect the final look of the cabinet. The narrower line can barely be seen, and you would have to be looking for it closely to even notice it.
Step Ten: Allow to Dry
As you complete each drawer front it should be placed to dry. Because you are placing thin popsicle sticks onto the front you want to make sure that they adhere to the front completely.
I placed heavy weights on each drawer as the glue dried – for at least 24 hours.
I actually used weight plates for this, and placed several on top of the drawer so that all parts of the drawer front were covered in a heavy weight. You can of course use whatever heavy items you have to hand for this.
Step Eleven: Sand again
Once the drawers are completely dry, you will lightly sand over the front of the finished drawer front again.
Step Twelve: Apply Polyurethane Coats
Wipe off the front of the drawer with a damp cloth to make sure any sanding debris is cleared away.
Apply one or two coats of polytherane gloss to the drawer, allowing each coat to fully dry in between.
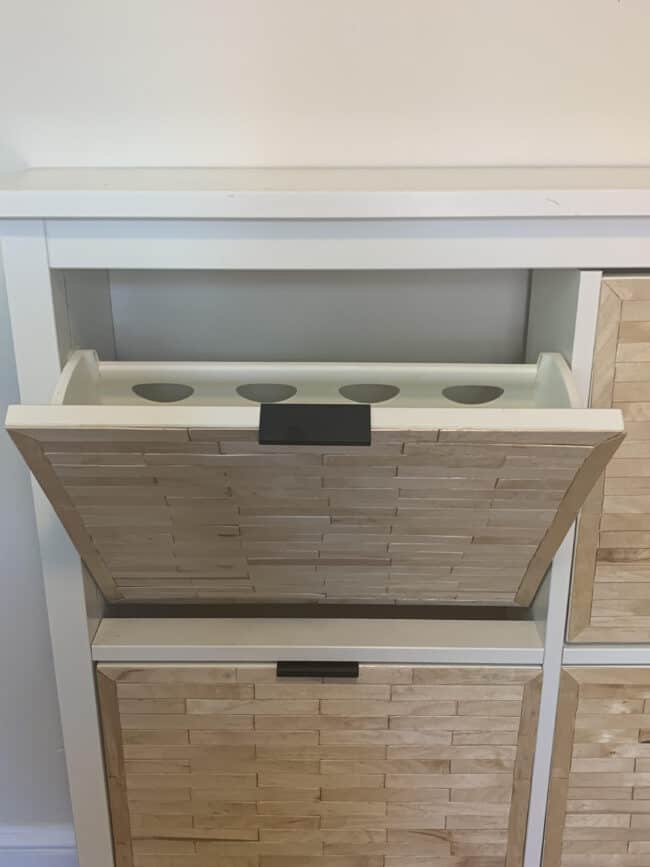
Step Thirteen: Attach Drawer Handles
You are now ready to attach the drawer handles to the front of the drawer. I used these pull down handles for my cabinet. You can of course use any drawer handles or pulls of your choice.

Note: You will have covered up the original drawer knob hole when you placed the popsicle sticks onto the front of the drawer. However, that hole can still be seen from the back. So if you need to place a knob or handle where it was originally you can measure using the hole at the back. I actually used the hole on the back of the drawer front to measure the center of the drawer to place my handles.
Check out these other IKEA hacks you will love here:
Brilliant IKEA Besta Hacks
12 West Elm Style IKEA Hacks for your Home
14 Stylish & High End IKEA Hacks
IKEA Fluted DIY Hacks
12 Magnificent IKEA Mudroom Hacks
IKEA Gladom Terrazzo Table Hack
17 IKEA Hacks that Look Designer & Expensive
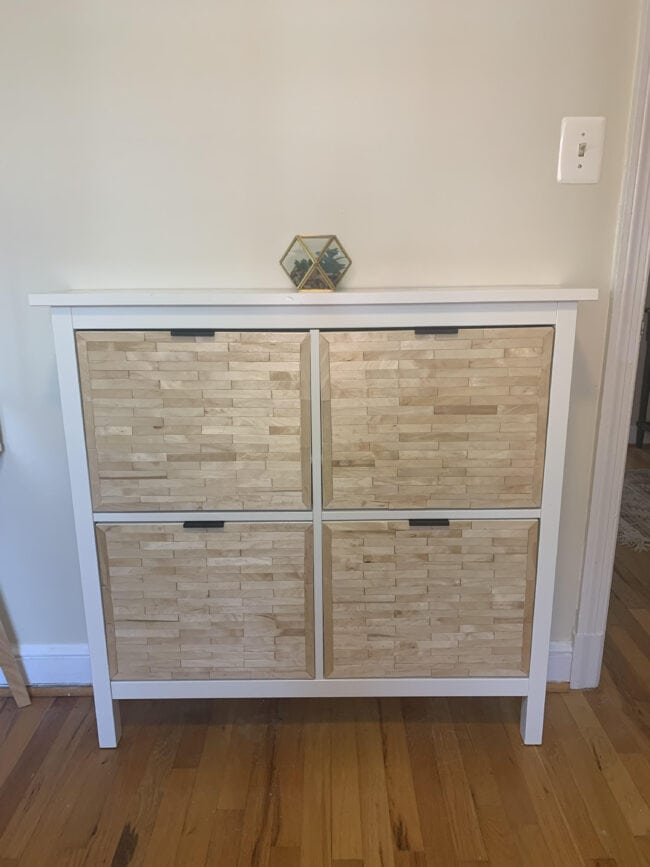
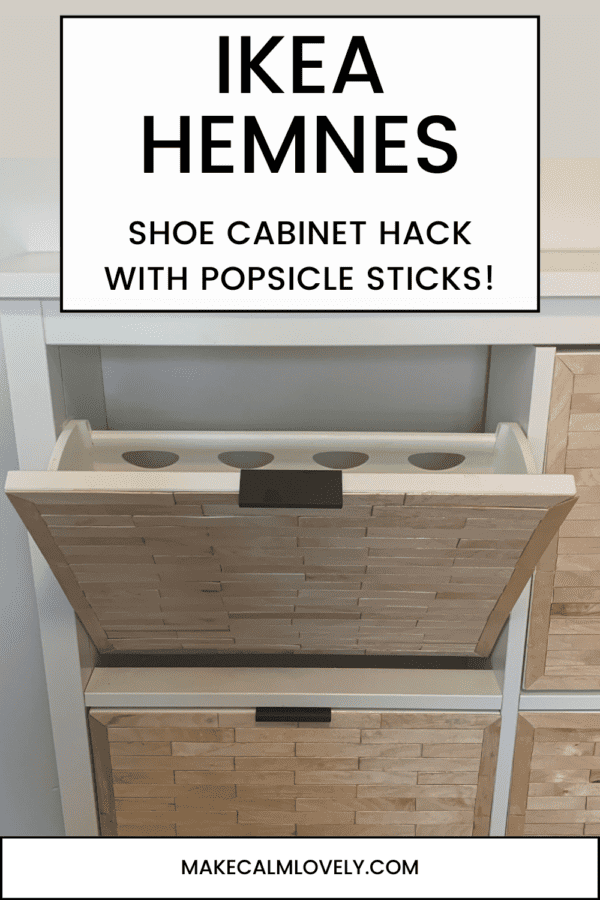
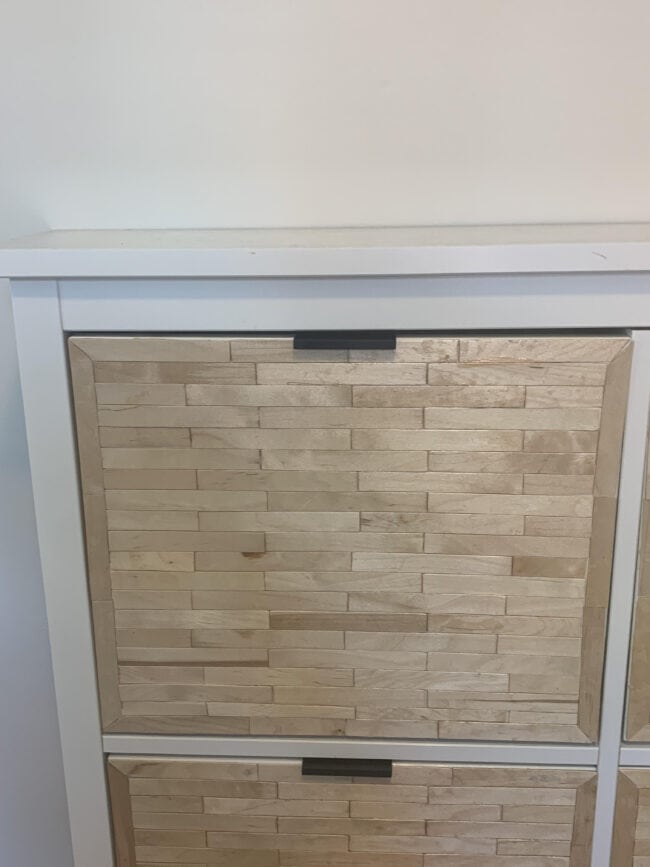
Styling the Finished IKEA Hemnes Shoe Cabinet Hack
I really love the end result of this shoe cabinet hack!
By applying the final polyurethane coats of gloss it also gives a really nice sheen to the finished drawer fronts.
You can use your finished shoe cabinet for shoes, or anything else that you may need it for.
The cabinet itself makes a great cabinet for any entrance hallway. It is narrow enough to fit into most entryway spaces, and you can use the pull down drawers for shoes, keys, glasses etc – whatever you need to have to hand in your entryway.
This beautiful DIY hack of the IKEA Hemnes shoe cabinet was created using popsicle sticks! See how to upgrade the cabinet here!