
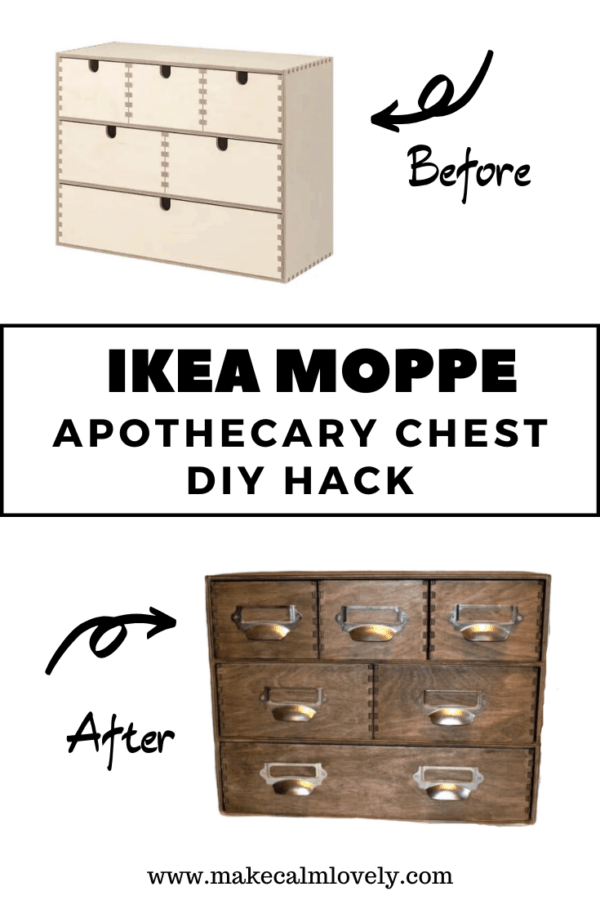
DIY IKEA Moppe Apothecary Storage Chest Hack
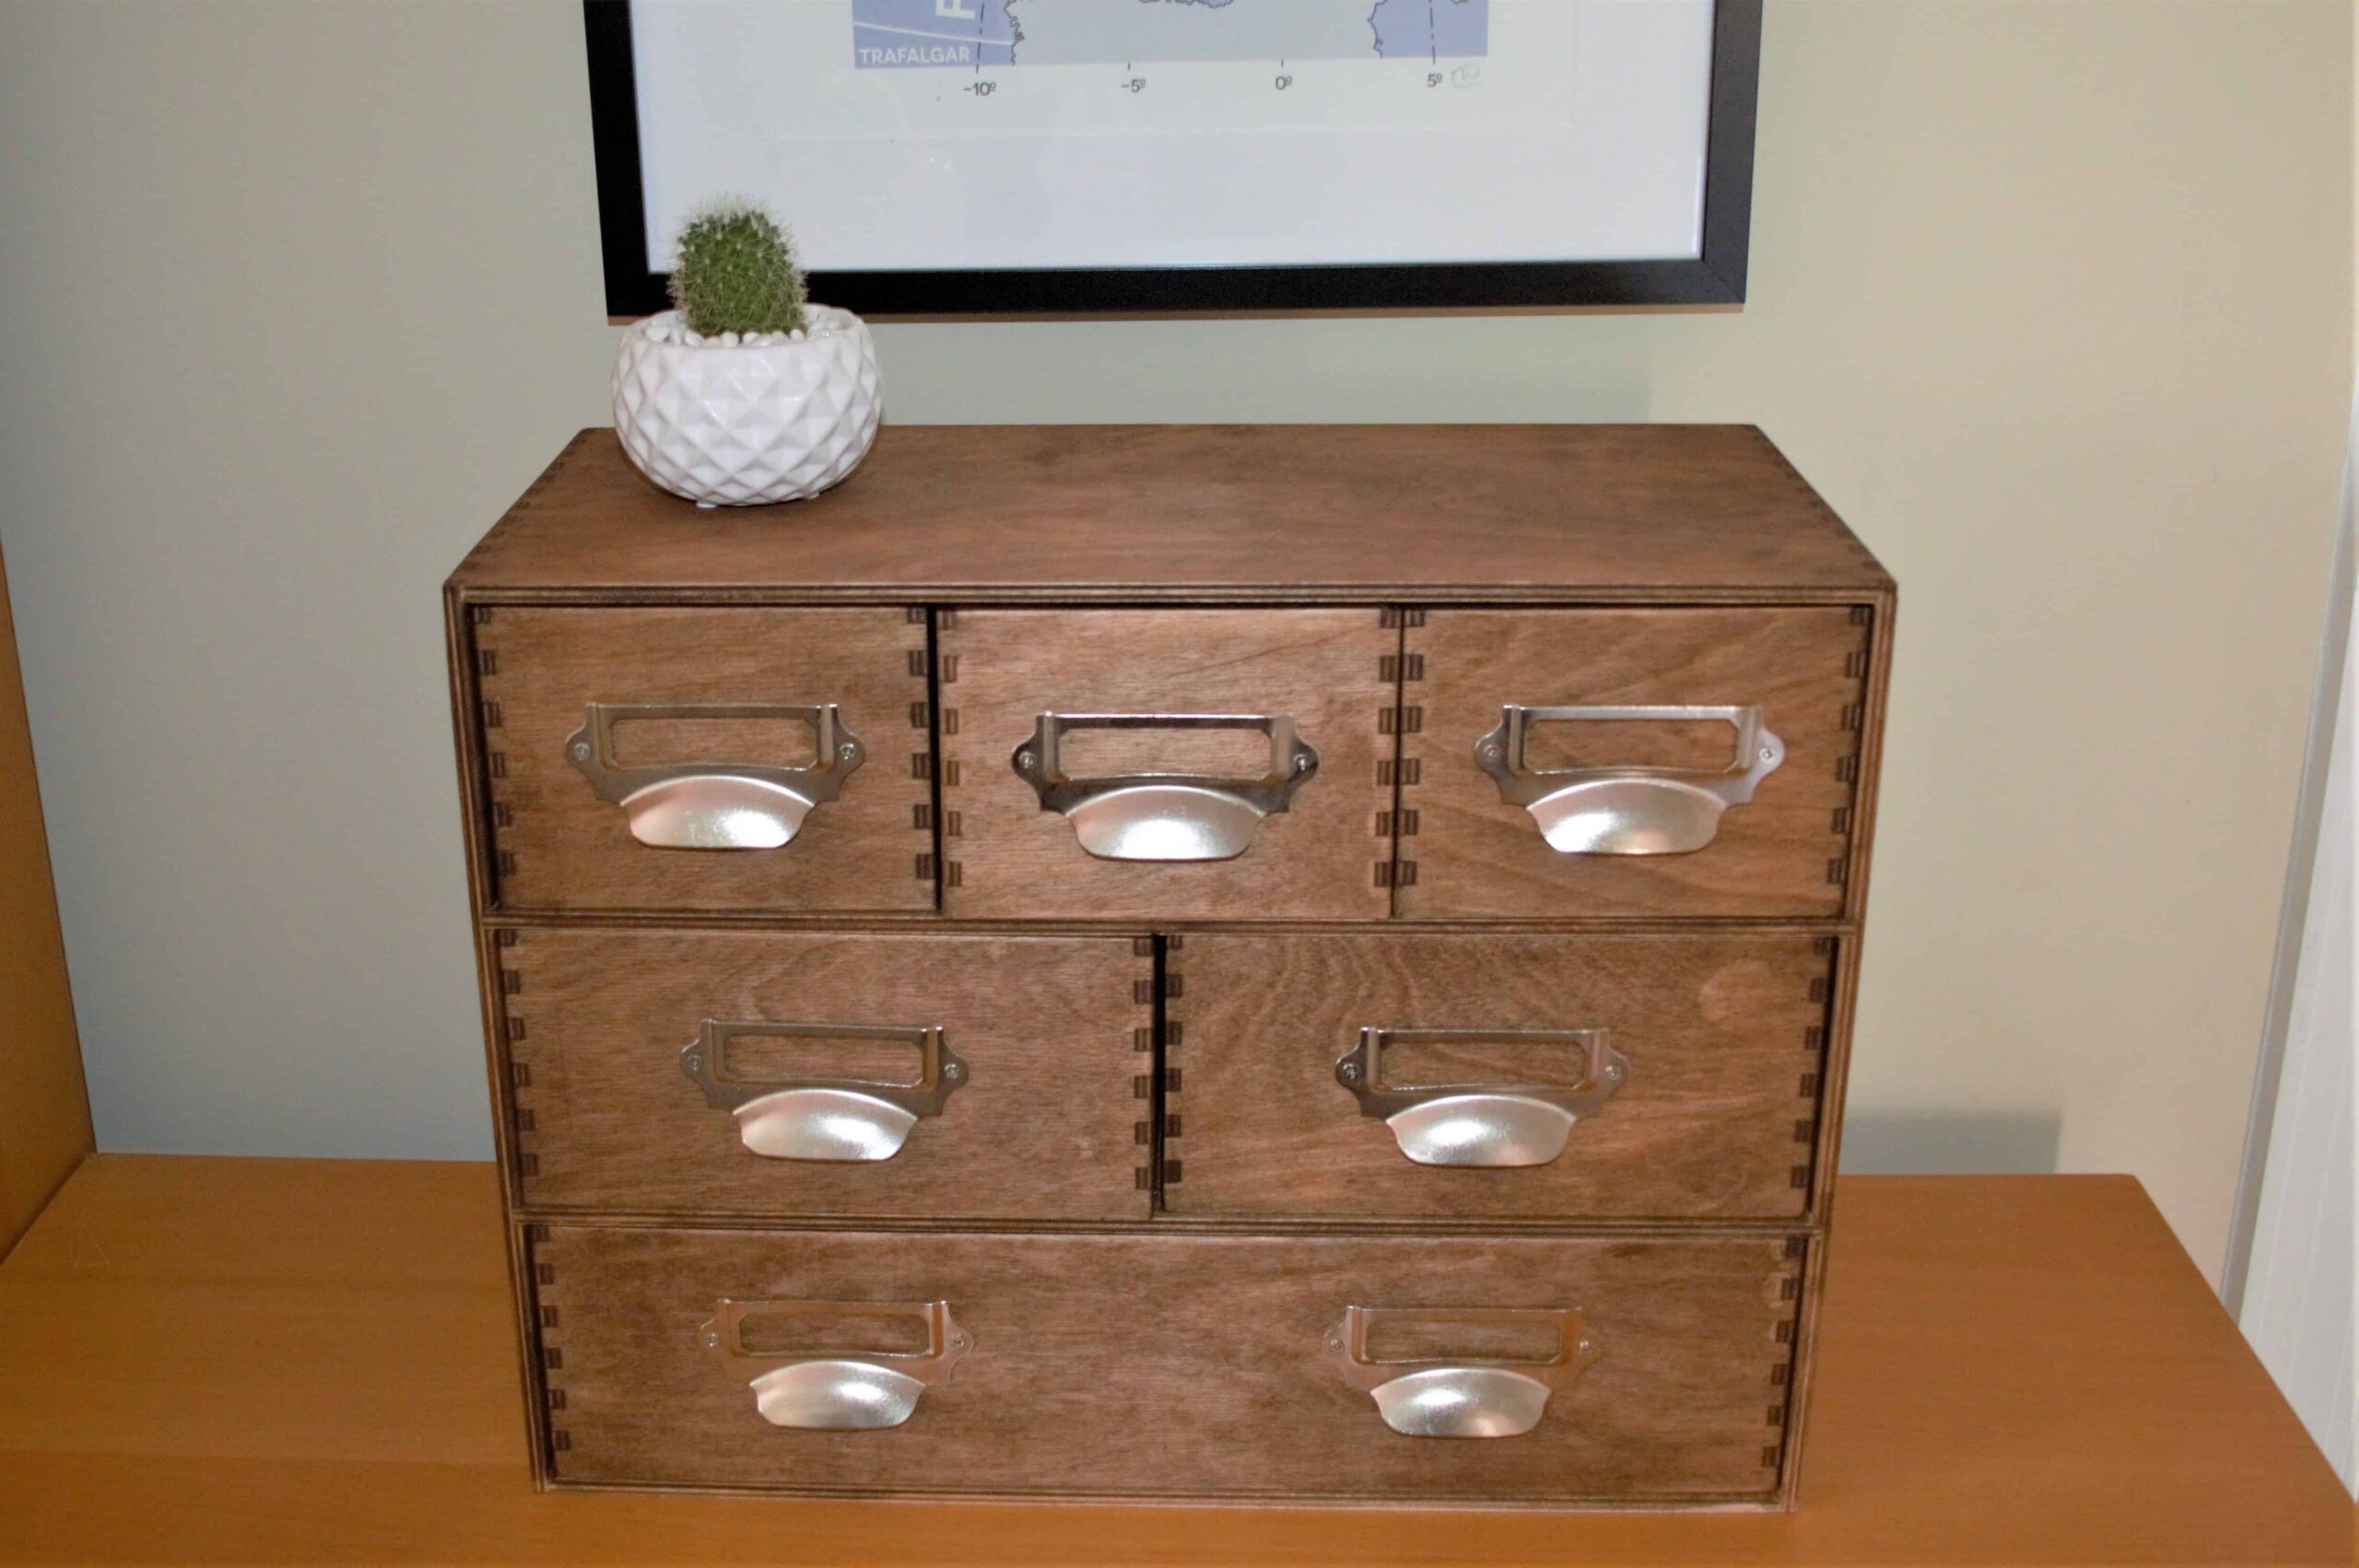
This IKEA hack completely transforms the simple birch IKEA Moppe Mini Storage Chest into a Beautiful Apothecary Chest
I absolutely love IKEA hacks, and I love Apothecary cabinets and vintage farmhouse style. So the two of these things came together so easily with this amazing hack!
The end result of this hack looks like a vintage piece of furniture. But it is incredibly easy to do and make up, and it can be done in just an afternoon.
This hack totally transforms the simple (but beautiful) Moppe mini storage chest into an incredible vintage looking piece.
This post contains affiliate links. This means that if you click on a link and purchase something via that link I may receive a small commission, at absolutely no additional cost to you. You can view my disclosures here.
Supplies Needed for IKEA Apothecary Box Hack
Wood Stain (I used this one)
Steel Wool (such as this one)
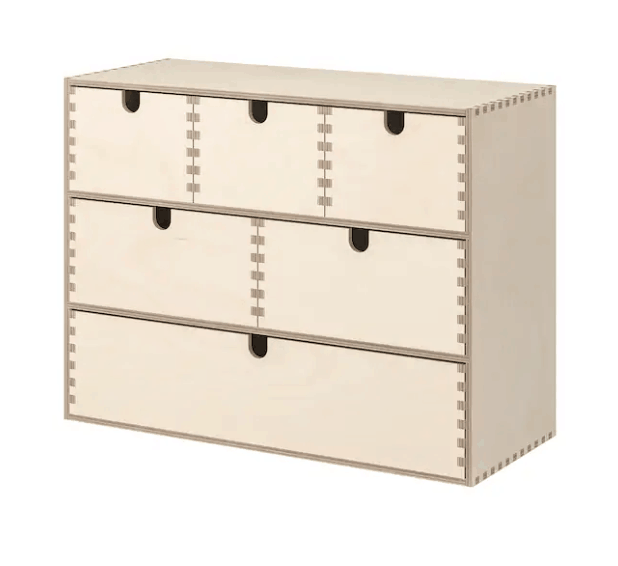
IKEA Moppe Mini Storage Chest (You can also buy it here)
Fine Sandpaper
Handles with label slots (I used these ones)
Screwdriver
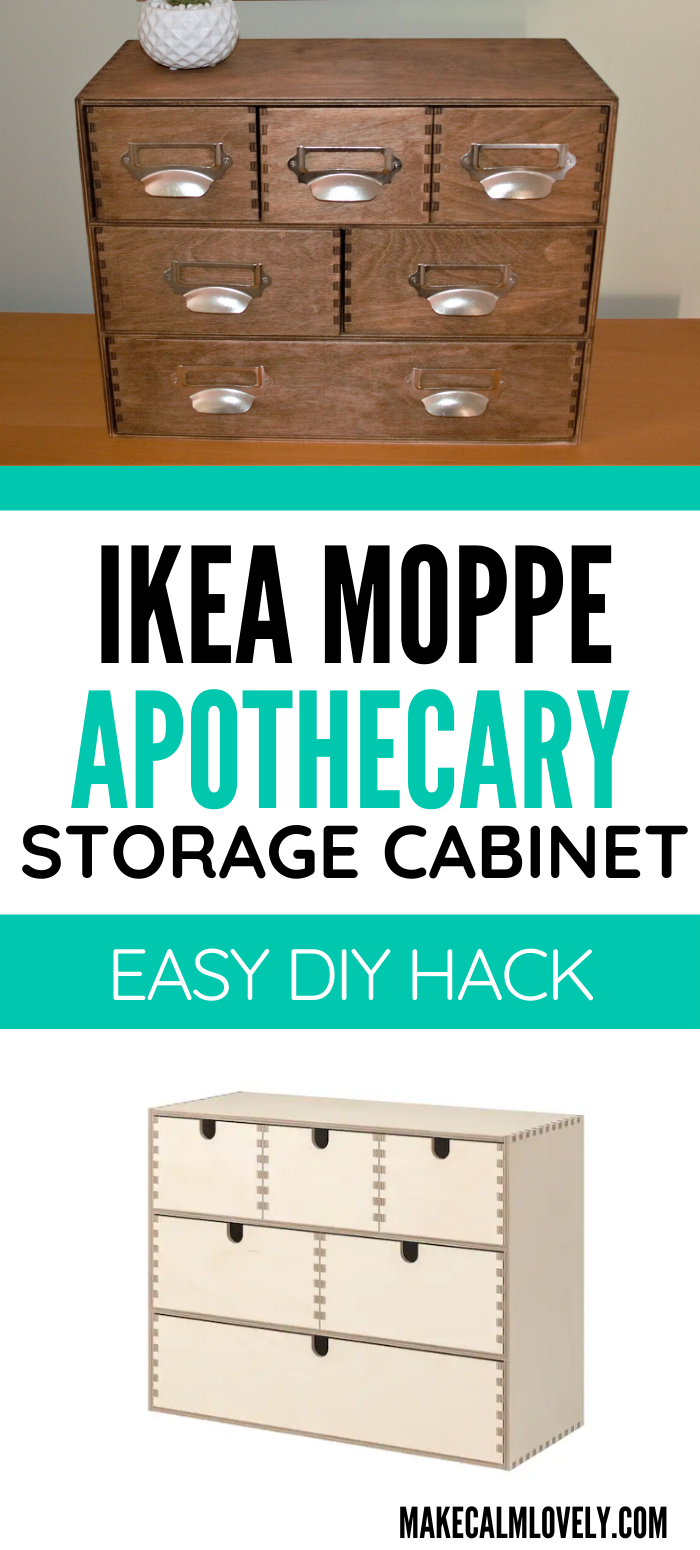
The IKEA Moppe Mini Storage Chest
IKEA Moppe Mini Storage Chest is a beautiful, yet incredibly simple, storage piece sold by IKEA. It comes in one color wood only – a light birch wood.
I always think that Moppe is just crying out to be transformed and hacked!
While you can use the Moppe drawers as they are, with their beautiful light wood that is so embraced in Scandinavian design. Moppe is really a blank canvas that you can do anything at all with.
There are so many things you can do with the Moppe chest, including painting it, putting washi tape on it and more, to totally transform it.
But I think staining it with wood stain is one of the absolute best things you can do with Moppe!
What is an Apothecary Chest?
Apothecary chests have numerous small drawers. Those drawers can be all the same size, or different sizes.
These chests were originally wall mounted in shops, or they were carried from house to house. They traditionally stored medicines, herbs, and tobacco.
As the name suggests, they were originally used by pharmacists and general practitioners, possibly originating in Europe and the Far East during the Middle Ages.
These chests are very much in demand these days, especially vintage ones that can be fixed up. They have such a unique style to them that they take pride of place in home decor.

Step by Step How to turn Moppe into an Apothecary Storage Unit
First before I go on to the instructions, I want to give you information about wood stain.
You can use whatever brand of wood stain you want to use for this DIY project. You can also use whatever wood color hue you like best. I used a Walnut stain, as I think it really conjured up the old Vintage wood used so often in the past.
The stain I used has a really good penetrating formula, that really soaked into the wood. I used steel wool to apply the stain, because steel wool will not absorb the liquid (you don’t want more stain on what you are applying it with, than on your wood!)
The stain I chose was actually chosen because when I visited an antique emporium this was the stain they recommended, and sold for all their antique pieces.
As to colors, there are so many different colors and depths of wood stain available. These include cherry, walnut, mahogany and golden oak, among so many others.
To look authentic, I really think this piece requires a dark stain. As I mentioned previously, I used walnut for this. You could also try dark stains such as mahogany.
If you are not sure about what color stain is best to use, purchase a couple of different stain colors. Then test the stain on a part of the Moppe unit that is not visible, such as on the bottom. Test with a couple of coats to really see how the stain will look. Note: I used 4 coats in total on my finished piece.

Step One: Prepare the Moppe Unit
The first thing you need to do is take all the drawers out of the unit.
Using sandpaper, sand down each drawer.
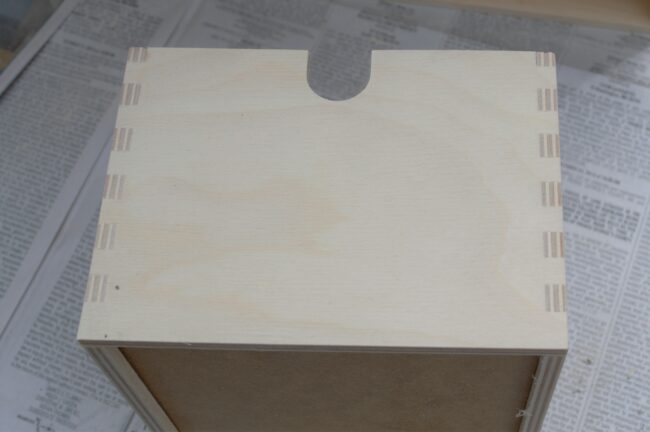
Note: The drawers are going to be turned around for the finished piece, so that the notch that is currently visible in the front of each drawer, is turned to the back and not seen. Therefore you can pay less attention to sanding the piece with the notch, as it won’t be seen.
Sand down not just all the sides of the drawers, but also pay attention to sanding the top open part and bottom part of each drawer. The birch wood is very light weight, so be careful not to splinter off pieces as you are sanding.
Also sand the notch join marks at the sides of each drawer. By sanding down these and the top and bottom of the drawer, you will give the impression that the piece is well used.
Step Two: Stain Each Drawer & the Main Unit
Using the wood stain, with steel wool, rub the stain over each drawer, and also the main unit.
I would advise doing all the staining outside if possible. The stain is smelly and inhaling it could cause health issues.

An easy way to apply the stain is to place the notched end of each drawer on the ground (this is going to be the new back of each drawer), and stain each side. There is no need to stain the inside or the bottom of the drawer, unless you want to.
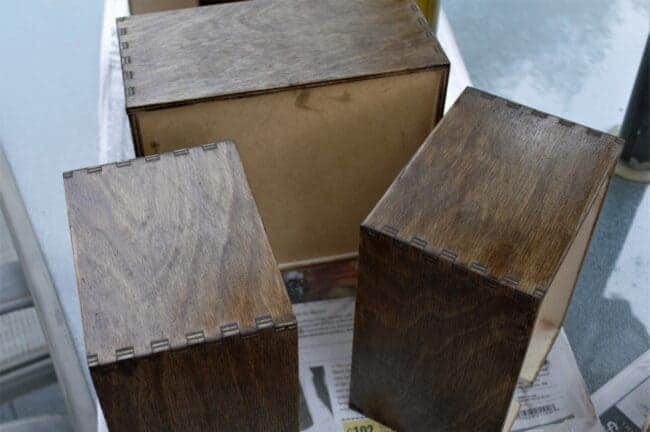
Also stain the main unit that the drawers fit into. You will want to stain all the sides and the back of the unit. It is up to you whether you want to stain the inside of the unit. But I think it is a good idea to stain the inside also, as when each drawer is pulled out you will only see like-wood.
Allow each coat to dry thoroughly before placing another coat. I did a total of 4 coats in all for my unit.
Related: See all the other Hacks you can do with IKEA Moppe!
Step Three: Apply the Handles
Wait until all the drawers are completely dry before attaching the handles.

Line up each handle on the respective drawer so that it is even. You could measure each one in place if you want to be especially sure that it is evenly placed on the drawer.
I found that an issue was the handle moving around, therefore moving out of place once it was lined up.
I used a piece of masking tape to hold the handle in place, so that it was easier to screw into the wood. (Only use a piece of tape such as making tape, and don’t press it down too hard, as you don’t want to mess up the stained wood once you remove the tape).
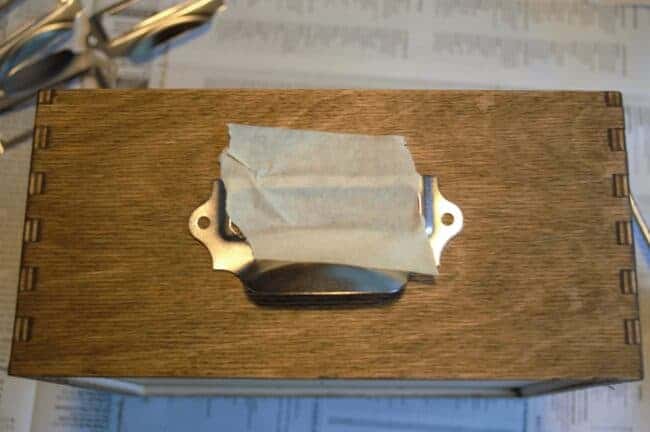
I lined up each drawer next to each other, as I placed each handle. That way I could be sure that the handles all lined up with one another. Remember the drawers (especially the smaller ones) are going to be lined up next to each other inside the unit.
Screw in each handle. You will be using one handle on each of the three small drawers at the top, one on each of the middle drawers, and two on the larger drawer on the bottom.
Don’t screw the screws in too tightly, just enough to secure fix them. The wood of the Moppe cabinet is very lightweight, and could splinter if you apply too much pressure.
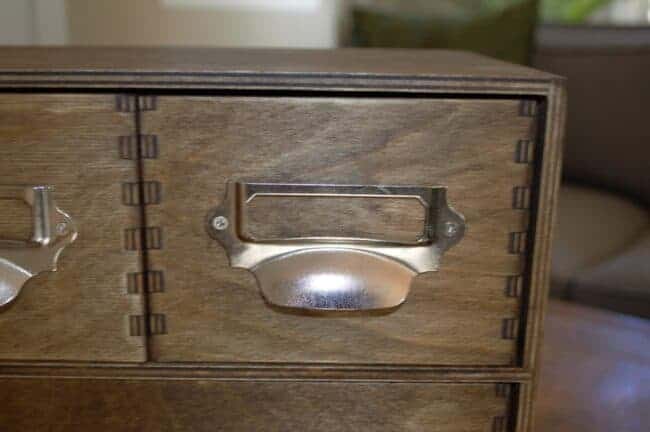
Step Four: Make Labels for the Handles
You can really use any paper or cardboard to make labels to slide into the label holder that is incorporated into the handle piece.
If you want to create more antique looking labels you choose a cream or yellow-tinged paper stock for these.
Make labels for whatever you will be storing in each drawer, and insert into the slot.
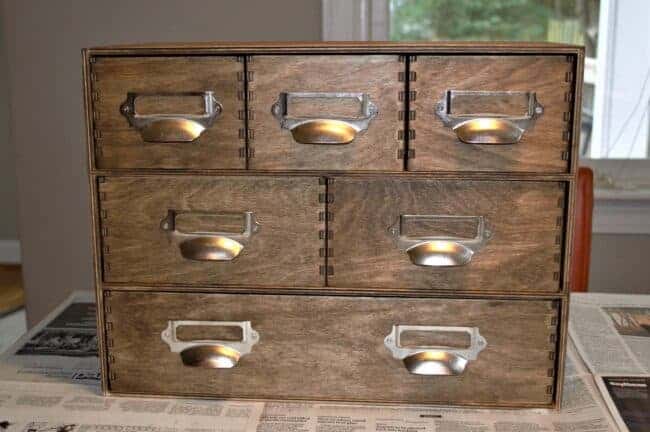
You now have a beautiful Apothecary storage unit! This piece really looks great with any home decor, and in any room of your home.
Some suggested uses are in your home office as a storage chest, and in your kitchen to stool small tools or even spices. You could also use this in kids rooms to store all those small toys they accumulate constantly. It could also be put to good use in your garage (but I really hate to hide this beautiful piece away somewhere it won’t be seen as much!)
Pin this for later!
You will also love these great IKEA Hacks!
Amazing IKEA Hacks you can do in a Weekend
Great Farmhouse IKEA Finds for your Kitchen
This IKEA hack completely transforms the simple birch IKEA Moppe Mini Storage Chest into a Beautiful Apothecary Chest