
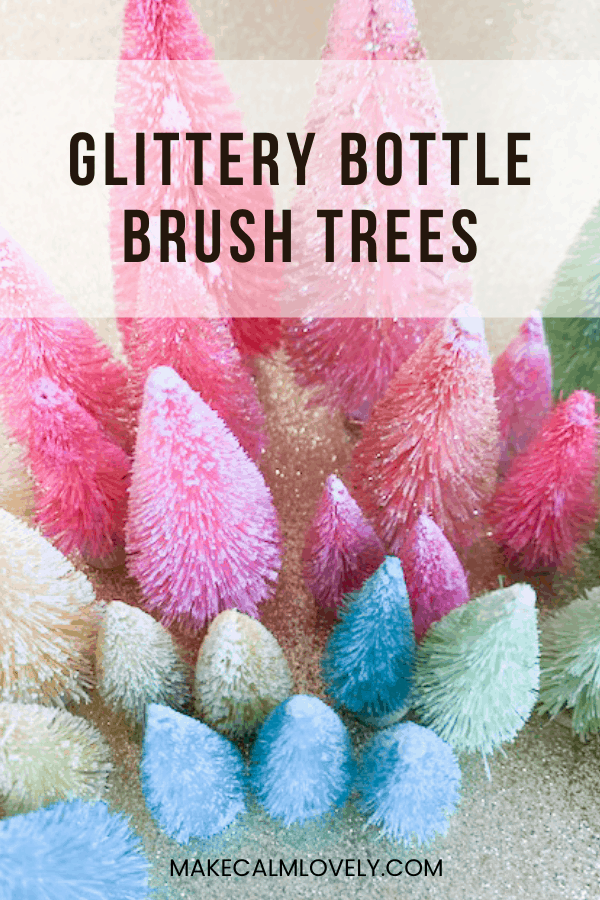
DIY Glitter Bottle Brush Trees
These colored glittered bottle brush trees are an easy and fun DIY! Make these gorgeous trees to display during the holidays, or even year round!
I have been wanting to do this DIY for a long time! I had all the supplies, but I kept putting it off. I don’t know why I kept putting it off – because this was so much fun to do! I waited for a rainy day, and got stuck in to this DIY project!
I have always loved the look of colored bottle brush trees. They are a lovely decoration for the holidays and Christmas. They are great small decorations for places such as mantlepieces and even tables.
With these trees you can use a few, or as many as you want to, to create a great decorative display. That is the beauty of bottle brush trees. They can also easily interact and add to your existing decorations.
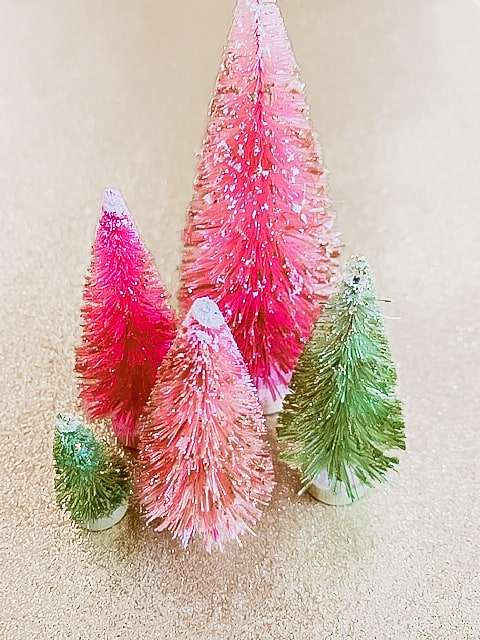
This DIY colors bottle brush trees first, and then adds an extra sparkly holiday element to them – with the addition of gold glitter! (you could also use any color glitter of your choosing).
This is such a fun DIY project to do. Your kids would actually really love this project too!
I had a lot of fun doing this project. It was the perfect stress-busting DIY project! Because it is so bright and colorful to do, and so much fun to dye the trees and see all the shades of colors that can be created.
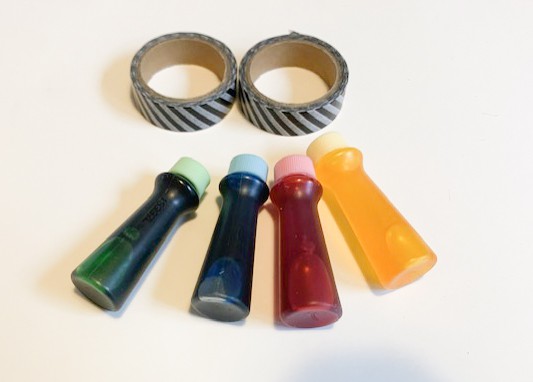
Supplies Needed for the Bottle Brush Trees
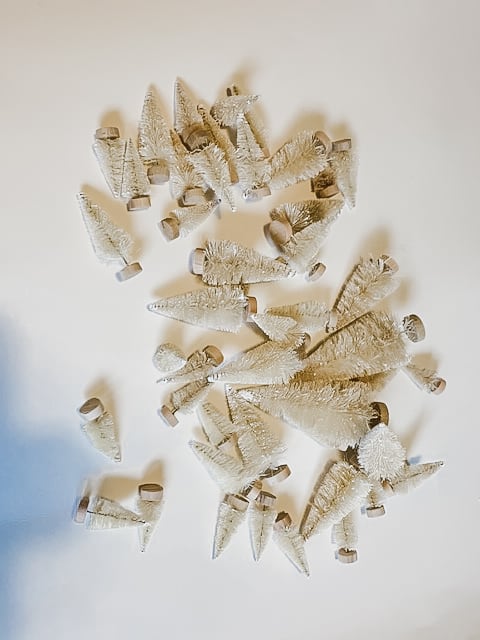
White bottle brush trees, in assorted sizes
Food coloring, assorted colors
Water
Tape – such as washi tape or masking tape
The bottle brush trees are available quite easily. You can either buy all different sizes (like I did) or buy the same size – depending on the look that you want.
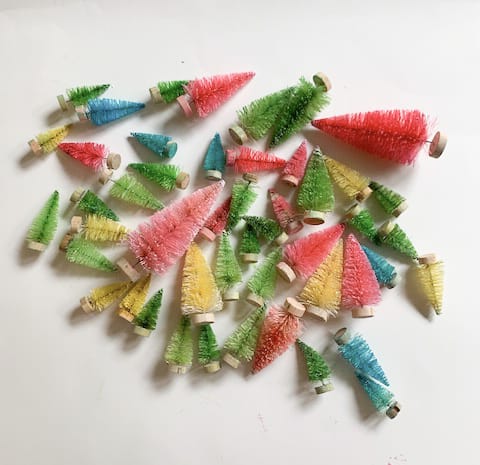
For the food coloring, I bought the primary main colors of red, yellow, blue and green. The red coloring was used to make the pink trees – and it was fun to try different water to color combinations to see how many different pink shades I could come up with!
This post contains affiliate links. This means that if you click on a link in this post and purchase something via that link. I may receive a small commission, at absolutely no additional cost to you. You can view my disclosures here.
How to make the Glitter Bottle Brush Trees
Step One
Prepare your work surface. This can get a little messy, I won’t lie (all part of the fun!). I put down lots of newspaper to cover my table.
Assemble your supplies together. You need the tape, food coloring, a spray bottle, and of course the trees. Plus you need the gold glitter nail polish, or glitter of your choice.
Step Two
You are now going to start dying your trees! This is the fun part (well actually there are many fun parts to this, but this is the first fun part!).
Lay out all the trees. If you have already decided how many to dye a certain color etc, place them in groupings.
Here they are all in their untouched state!

Step Three
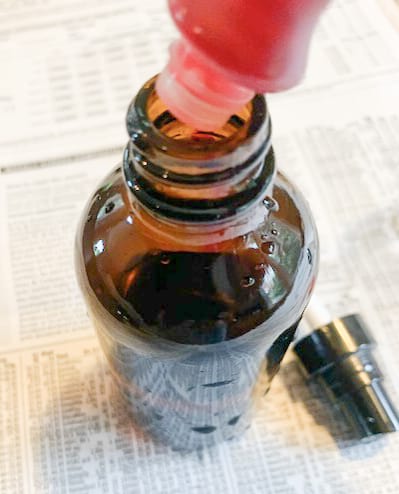
Fill the spray bottle with about half water, and a few drops of your chosen food coloring color.
Step Four
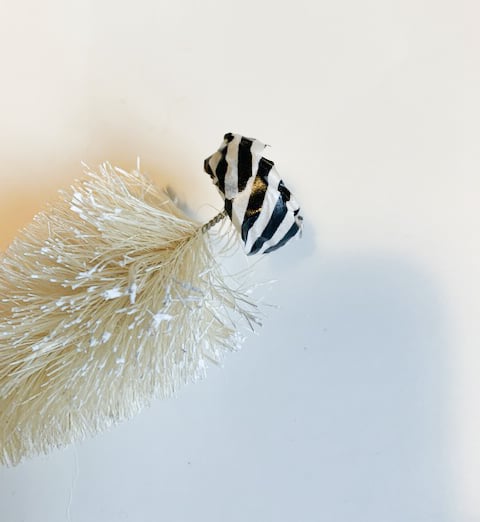
Put a piece of tape around the wooden bottom of the tree, to protect it from the food color. The base is usually wood, so it can easily get stained with the food coloring otherwise.
Step Five
Now, using the spray bottle full of water and food coloring, spray the tree on all sides. You can hold the bottle brush tree with the wooden base to do this, and turn it as you spray.
Note: You may want to use gloves to do this part. I didn’t and I did have some lovely colored hands for a few hours afterwards! Even if you are careful, some can get on your hands.
Step Six
Place the tree somewhere to dry, preferably on newspaper or other surface.
Repeat again until all your trees have been sprayed and colored.
Step Seven
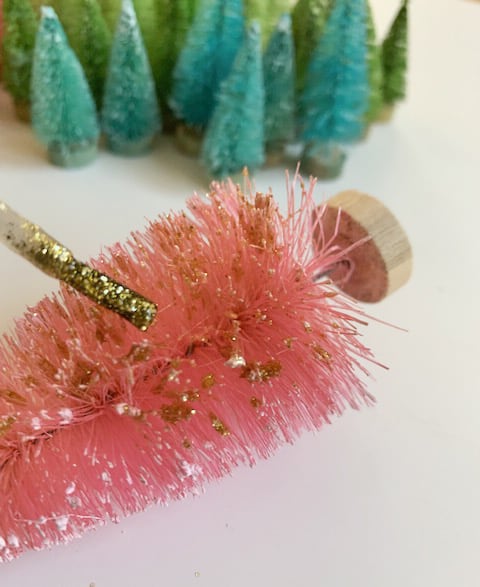
Once the trees are dry, using the gold glitter nail polish, paint the gold glitter onto the tree branches. You just need to paint it onto the tips of the branches.
You could also do this with just regular glitter, and something like Mod Podge. Just apply the Mod Podge to the tips of the tree branches, and sprinkle the glitter on top.
You could also use something like liquid gold leaf also to do this. I found the nail polish really easy to use for this, as it comes with a little brush that makes it easy to apply the glitter.
How to Display your Glitter Bottle Brush Trees
You can have a lot of fun displaying these trees! Display them on a mantlepiece during the holidays and Christmas time.
You can also display them year round. No reason why you can’t have sparkly trees on display every day of the year!

Check out our other holiday DIY projects too!
Beautiful Ideas for Displaying your Holiday & Christmas Cards
19 Holiday Advent Calendars to DIY
IKEA Christmas Hacks for the most Wonderful Time of the Year!
16 Fun and Easy DIY Christmas Ornaments
15 Amazing Mid Century Modern Decor & Decorating Ideas from Amazon
I hope you have as much fun as I had making these glittery bottle brush colored trees! This is a great DIY project to do for the holidays. These trees should last you through many holidays!
These colored glittered bottle brush trees are an easy and fun DIY! Make these gorgeous trees to display during the holidays, or even year round!