
10 Tips for Buying & Assembling IKEA Furniture
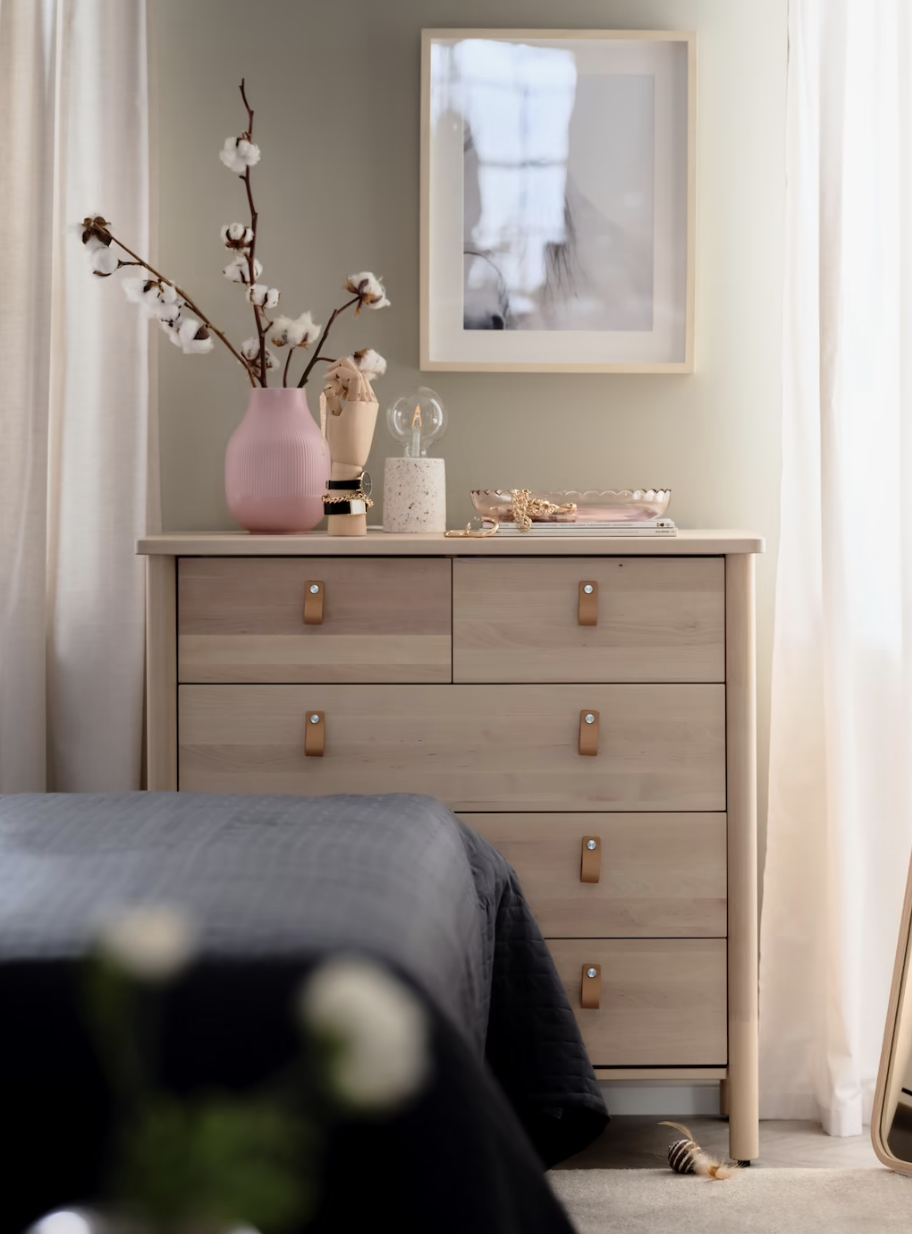
IKEA furniture is stylish and affordable and loved by so many throughout the world. But you do have to assemble most of their pieces yourself. See my 10 tips here for buying and assembling IKEA furniture so you won’t lose your mind!
If you love IKEA furniture (and who doesn’t love the affordability and style of IKEA furniture!) you will know that you will need to assemble a lot of those pieces yourself.
You are going to be either in the love it or hate it camp when it comes to assembling IKEA furniture!
My daughter for instance LOVES assembling IKEA furniture. She loves puzzles and Lego and solving problems, and she gets very excited about assembling a piece of IKEA furniture!
But I know so many people who HATE it! With a passion!
But assembling IKEA furniture is really not that hard – honestly. You may look at the instructions and want to scream, but if you just take a deep breath, and follow my tips and suggestions below I promise you that you will have that piece assembled in no time at all!

This post contains affiliate links. This means that if you click on a link in this post and make a purchase via that link I may receive a small commission, at absolutely no additional cost to you.
Know Your Skill Level
If you know that you really have zero skills in assembling furniture – as in you have tried it before and almost had a breakdown, don’t take on too much with having to assemble a piece of IKEA furniture.
On the other hand, if you love assembling furniture, you are up for a challenge, you are great at DIY, then you will have fun doing it and it will probably be a piece of cake for you!
You yourself know your own skill level and what you can and cannot do.
IKEA does have an in-store assembly service called Task Rabbit, that can put together your pieces for you, at a charge.
The charge for this does vary depending on the item. It can range in price from under $50 to as much as several hundred dollars, all depending on the piece and size.
IKEA also does have some partnerships with local companies that will deliver the piece to you and then assemble it for you. It all depends on where you live and the IKEA store.
So if you really really cannot face doing the assembly yourself (and my other tips and suggestions don’t work for you!!), there is an option for you!
Related: IKEA Brimnes Vanity Table DIY Hack
How to Know how Hard or Easy an IKEA Product will be to Assemble
IKEA really does make it easy for you to assemble their furniture, and also to know how difficult or easy it might be for you too.
Take a look at the IKEA website and find the product on there that you are wishing to purchase.
For instance, here I am looking at the IKEA Brimnes bookcase.
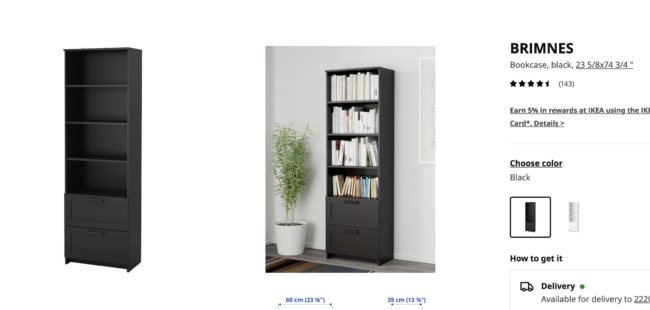
Scroll down to the bottom of the product listing page, and click on Measurements:

Then click on Packaging:
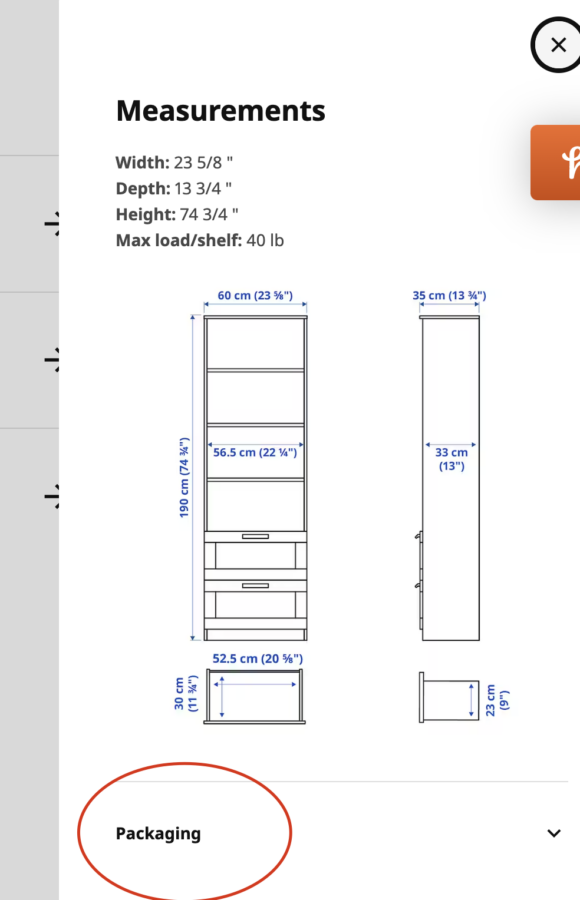
As you can see here – this listing lets me know that this bookcase comes in 2 packages:
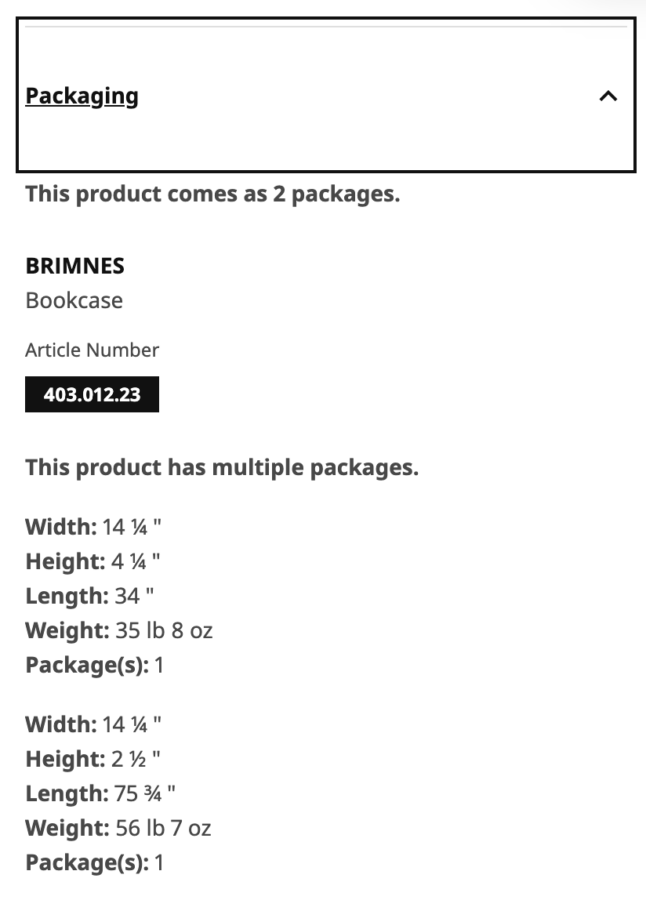
From this I can learn that there will probably be quite a few parts to assemble, although obviously not as bad as more than 2 packages!
If you go back and click on Product Details, there is a section for Assembly & Documents:

Clicking on the Assembly & Documents part gives you all the assembly instructions in a downloadable PDF – exactly the same instructions that you will get in the box with the item.
Therefore you can read through all the assembly instructions in detail before you decide whether or not to buy that piece!
IKEA assembly instructions are very easy to follow. They have really great graphics to make it much easier for you too.
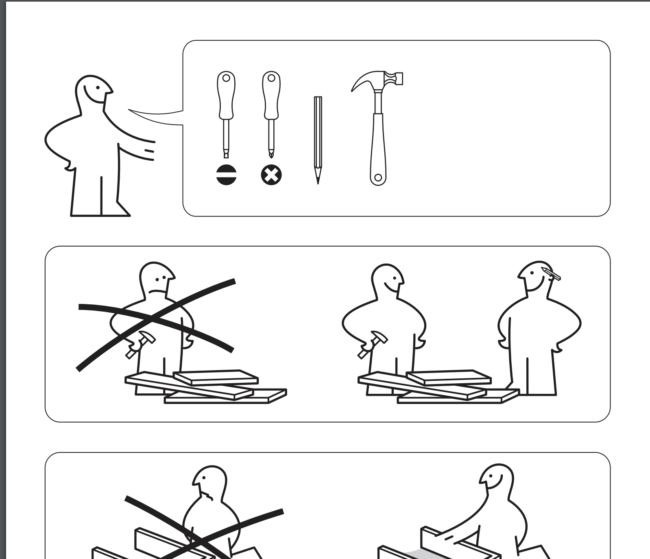
For instance below in the Brimnes bookcase instructions you can see that you will require a regular screwdriver, as well as a Phillips head screwdriver, a pencil, and a hammer!
It also advises doing this project with somebody else, not on your own!
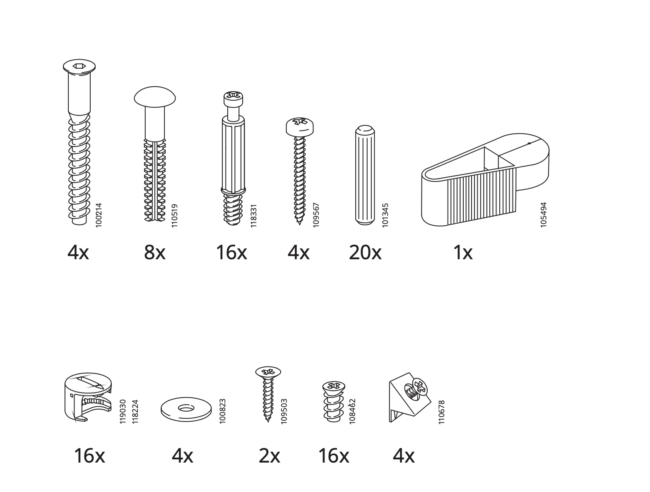
Another great thing about the assembly instructions IKEA gives is that they will show you all the required nails and screws required that are included in the package:
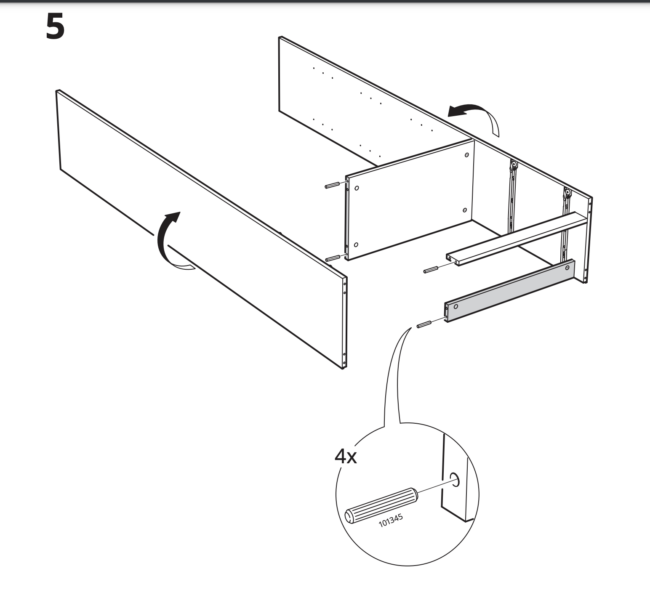
Then each page of the assembly instructions gives you graphic visual guides as to how to assemble each piece as you go along:
Therefore you can get a really good idea from all this information how many pieces there may be to assemble, how many and which tools are required, how many screws and nails will need to be placed, and each step of the assembly process.
That way you can see exactly how hard or easy you feel it may be for you to assemble this piece of furniture!
Related: 9 Etsy buys for Hacking & Upgrading your IKEA Furniture
Watch IKEA How To Videos for Assembly
IKEA does have its own YouTube channel where it posts assembly video guides for many of its products.
You can find these videos on the IKEA YouTube Channel here.
Here for example is their video for assembling the Pax wardrobe with hinged doors:
You can also go to YouTube in the general search and type in (product name) assembly instructions.
Many YouTubers have created their own guides to assembling certain types of IKEA furniture.
This can be especially useful to you if you are a very visual learner and prefer to watch rather than read instructions.
Go Through all the Assembly Instructions Several Times
The instructions that IKEA provides for assembly for its products are really not confusing. You may just think they are at first glance!
IKEA has everything covered with great graphics and drawings for everyone to understand, no matter what language you speak or what country you are in.
But that still doesn’t mean that you won’t look at those instructions and have a mini-meltdown!
Especially if you don’t consider yourself very handy around the home or at DIY, you may look at the instructions and just be so overwhelmed you can’t see the wood for the trees!
But follow these tips to make understanding those instructions so much easier, and not so complicated after all:
- Completely read the instructions through from start to finish before you start the assembly. Ideally read them a few times.
- As you do each step of the assembly, make sure you have read through the instructions for that step completely first, and that you understand that step.
- Assemble all the tools you will need together first. The instructions will have pictures of all the tools needed for that assembly project at the beginning.
- Look at the drawings of all the contents, and take out each piece from the packaging and lay it out to make sure you have that piece, and know what it is for.
- There will be drawings of all screws, nails, dowels, washers etc needed, and how many of each are needed. Make sure you have all that are needed, count that you have the correct number of each and place them aside.
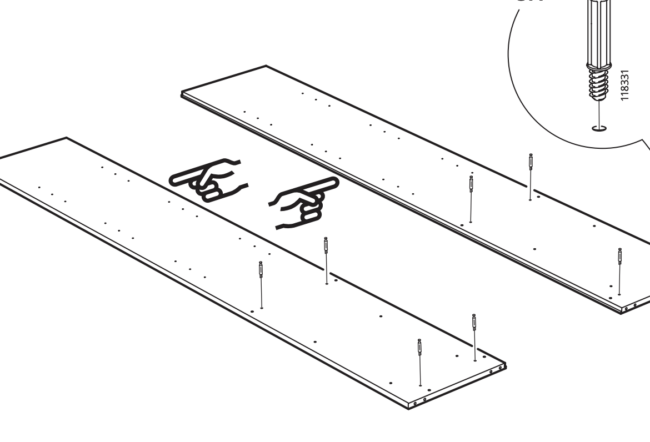
- The drawings do have pointers for the direction that pieces should face etc. Such as below where the hands are showing you the correct directions:
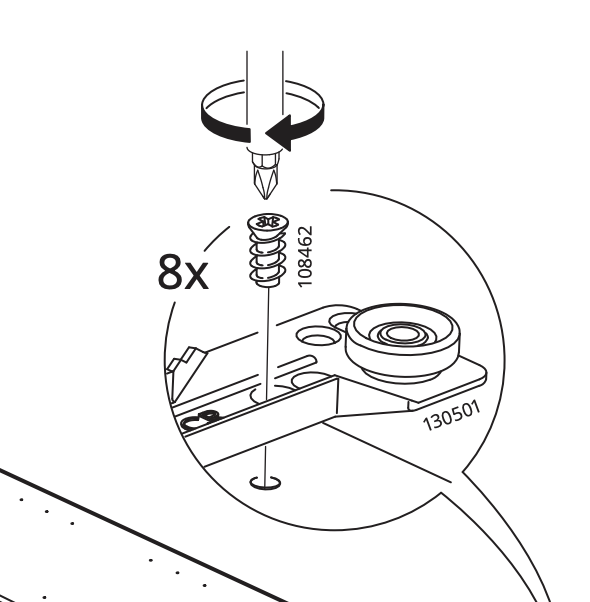
- The instructions will also show you which type of tool to use – such as the drawing below that clearly shows you that you need to use a Phillips head screwdriver:
Have Plenty of Floor Space
Completely clear the area in the room where you will be assembling your piece of furniture.
You need space to lay out all your pieces completely, take stock of what you have, and keep them ready to assemble.
If you have a lot of space it will be much easier to assemble your piece of furniture!
Consider Assembling Where the Piece will Live
Some pieces of furniture are very large and/or heavy once assembled. Therefore you may want to assemble these pieces on site where they will eventually ‘live’ in your home.
Ideally whatever you are assembling should be done in the room where it will go. As long as you have space in that room for the assembly.
It will make it much easier than carrying a large heavy piece of furniture into another room when fully assembled.
What to do if you are Missing a Piece of an IKEA Product
It is so annoying if when you are assembling something you realize that a piece is missing.
Unfortunately everyone makes mistakes, and IKEA can sometimes make a mistake with a piece being missed out of the package.
But there is an easy fix. Just call your local IKEA store about the missing pieces and they will either mail them to you, or you can go and pick them up.
All IKEA stores keep extra parts such as screws in their customer service department. So you can easily pick up what you need.
Related: IKEA Shopping Secrets that will give you the Best Deals & Prices
Prevent Buying Damaged Products
You know how awful it is to make a special trip to purchase something, and then when you get home that product is damaged. It just really sucks!
But you can pretty much ensure that doesn’t happen when you buy an IKEA product by checking the packaging before you leave the store.
IKEA products are flat packed in packaging that is fairly minimal – they don’t use additional padding such as bubble wrap or crinkled cut paper inside their packaging.
Therefore that packaging box that you see on the outside is pretty much just that.
This is a good thing of course – we way over-use packaging so IKEA have the right idea here for the environment, plus less of all that packaging helps to keep their costs down.
It is also a good thing because you can pretty much tell without opening the packaging first if the product is likely to be damaged.
If the packaging is dented or damaged in any way there is a really good chance that the product inside is damaged.
So before you leave the store, make sure your IKEA purchase has no noticeable dents, tears, dings etc.
If you still want the product with the damaged packaging, you may be able to get a special price on it. But it is a chance you will have to take as to how much damage there is.
Make your IKEA Furniture Look More Professional with Glue
Yes just something as simple as using glue during assembly can make your IKEA products not only look more professional and more expensive, it will also make them more hard wearing and less wobbly.
This is actually a pro tip from many designers who frequently use IKEA furniture and do IKEA hacks!
The best glues to use for this are either White Gorilla Glue, or Gorilla Construction Adhesive.
White Gorilla Glue is fast drying and is 100 per cent waterproof. It is much stronger than regular carpenter’s glue. It can also be used on a wide range of materials.
Gorilla Construction Glue is a stronger version of the White Gorilla Glue. It bonds to pretty much anything, and it is great for very large construction projects.
By placing glue on the pieces you are putting together it will hold that furniture together far more securely and strongly. Just don’t apply glue unless you are sure you are assembling that piece correctly!
Another great tip is to hammer in the wooden dowels. This will ensure they adhere more securely and strongly.
Adding a little bit of glue to them and then hammering them in with a hammer will also super-amp up the durability of your piece of furniture!
Have the Big Power Tools on Standby
Most IKEA pieces do not require a lot of tools for assembly, and IKEA supplies some of the smaller tools needed such as an Allen wrench.
You may need to use a hammer and screwdriver to put your piece together, but don’t hesitate to pull out your big power tools if needed.
A power drill and power screwdrivers for instance can really help you screw in those screws and nails so much more securely, and make the job far easier and faster.
A level can also come in really handy to make sure your pieces are level and even.
I hope that these 10 tips will help you get over your fear of assembling IKEA furniture and therefore give you years of enjoyment with that piece of furniture that you love!
IKEA furniture is stylish and affordable and loved by so many throughout the world. But you do have to assemble most of their pieces yourself. See my 10 tips here for buying and assembling IKEA furniture so you won’t lose your mind!