

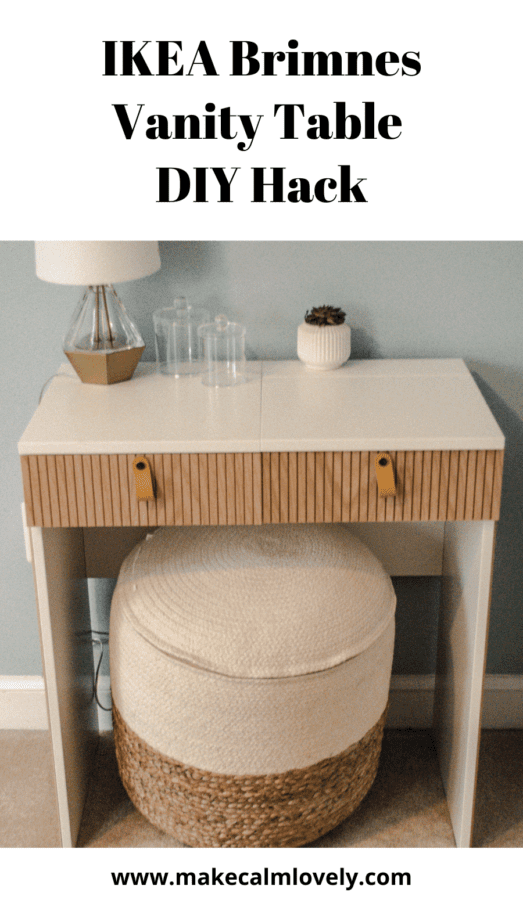
IKEA Brimnes Vanity Table DIY Hack
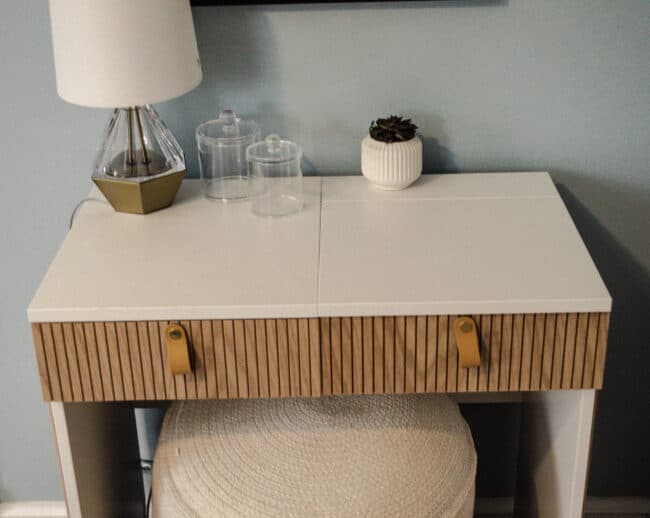
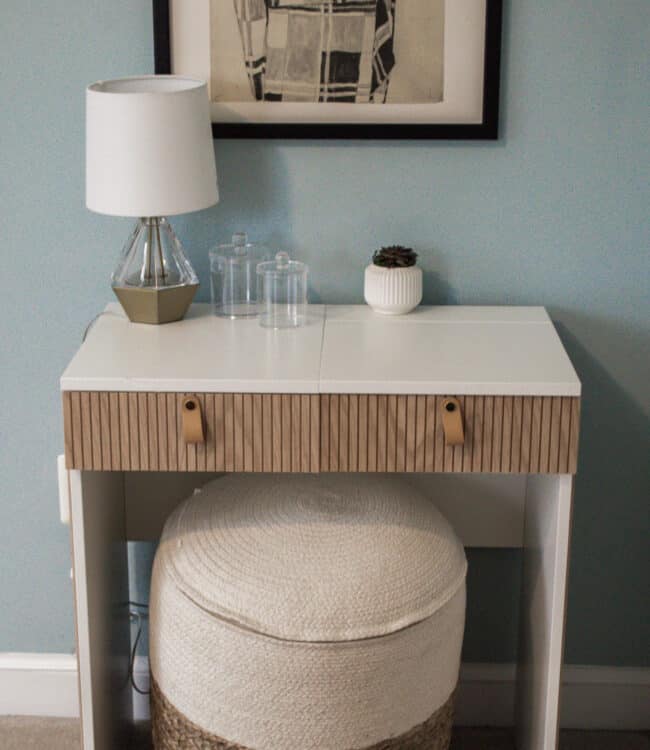
`The IKEA Brimnes vanity table is a pretty vanity table with a lots of storage space inside. In this hack I have turned it into a pretty Scandi-style fluted vanity table.
The IKEA Brimnes range features great pieces of furniture such as wardrobes, cabinets, nightstands, bed frames, headboards, and chests.
The range also features a great vanity table too!
Brimnes is a nice stylish vanity table, just the right size for most rooms and needs.
Brimnes also comes with a storage drawer, and another storage compartment with a hinged lid that contains a make-up mirror too.
The vanity table comes in two color options: white and a dark gray. Both are colors that will fit into most home decors and color schemes.
However, I found the dark gray just a little too dark, and the white just a little – well – too white!
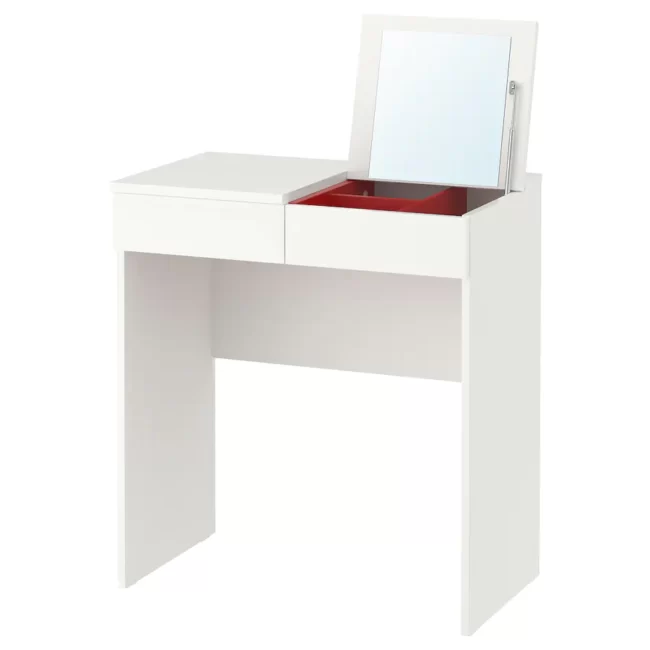
Below is how the vanity table looks in white – which is the color I bought.
The unit has a drawer on the left that opens up, and on the right is a flip up top that has a mirror and a storage area inside.
I wanted to try to make the vanity table a little more stylish and colorful.
I am not in any way saying that this vanity table isn’t stylish to start with – it is just not in my color choices, and as it is very basic looking I felt it needed some color, texture and design to it.
So in deciding what to do with the vanity table, and how to hack it, there were two looks that I knew I really liked.
One is the fluted look to furniture that is very on trend right now, and the other is the lighter wood Scandi-style of furniture.
Related: IKEA Fluted Furniture DIY Hacks
In looking at a lot of the fluted furniture hacks that are being done right now, the DIYs that most got my attention for the fluted look were the ones done with pole wrap.
Pole wrap is also an easy to apply pliable sheet of decorative wood, which makes it perfect and easy to use for DIY projects.
Pole wrap is primarily designed as a decorative wood trim for finishing or remodeling structural support columns.
There are 4 different types of hardwoods sold in pole wrap – oak, maple, cherry, or paint grade MDF.
I used the paint grade MDF shade for this project, but you could choose a different wood shade if you wanted to.
Many people doing fluted DIYs have been using more rounded pieces of wood to create the fluted look.
This looks great, but if you prefer a flatter look, which is what I wanted, then I do think pole wrap is the material of choice to use.
Pole wrap is extremely easy to work with too. It is very pliable, easy to cut, and a really nice thickness that makes it easy to apply and use.
Because pole wrap is basically individual wooden slats mounted on a backing sheet, that holds it all together, it is so easy to place in one piece onto furniture.
The other great thing about using pole wrap for a fluted furniture project is that you won’t have to caulk in between the pieces as you would applying individual pieces of wood for other fluted furniture projects.
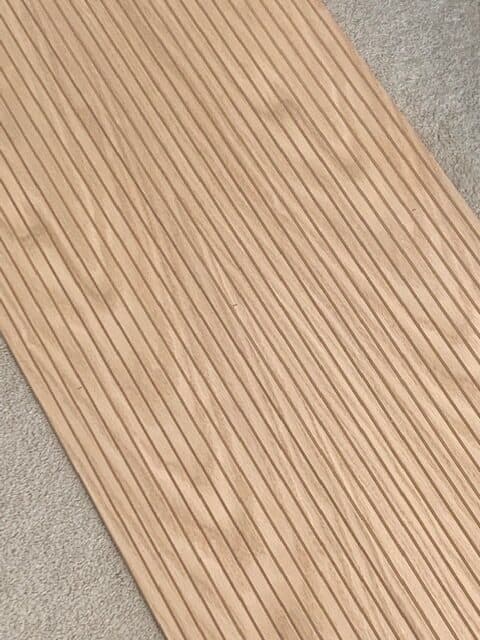
This saves you a lot of time and headaches. Below is a sheet of pole wrap, and how it comes.
This post contains affiliate links. This means that if you click on a link in this post and make a purchase via that link I may receive a small commission, at absolutely no additional cost to you. You can view my full disclosures here.
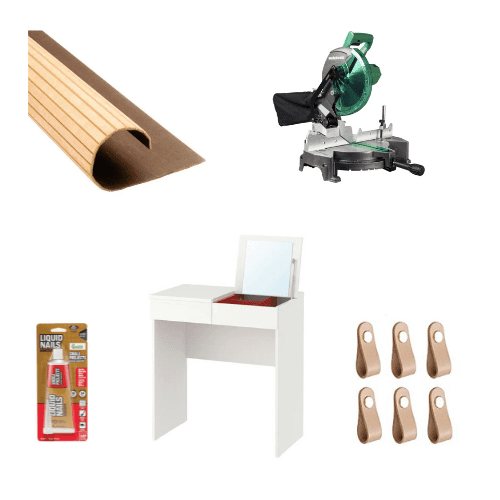
Supplies Needed for the Brimnes Vanity Table Hack
Supplies Needed for the IKEA Brimnes Vanity Table Hack
IKEA Brimnes vanity table
Available from IKEA stores
How to Hack the IKEA Brimnes Vanity Table
Step One: Assemble the Brimnes Vanity Table
To start with, assemble the entire Brimnes vanity table if you have not already done so.
I was amazed at actually how heavy this seemingly little table was once assembled!
So I would advise putting it together in the place it is finally going to be living and staying!
Step Two: Measure the Side Panels and Drawer Fronts
Once the table is assembled, you will need to measure the side panels and the drawer fronts to get the actual width for the pole wrap to be cut.
The measurements I used (which should also work for you too if you are hacking the same Brimnes vanity unit) was:
Left Side & Right Side Panels – 29 5/8″
Drawer fronts (one is a real drawer, the other looks like a drawer (but isn’t) that sits under the storage compartment with mirror) – 4 3/8″
Step Three: Cut out the Pole Wrap Pieces
You are only going to be placing the pole wrap on the left and right sides of the table, and on the drawer fronts.
So using those measurements cut the required sizes needed from the pole wrap.
You will have 4 pieces of pole wrap when you have finished cutting – two larger ones (for each side) and two smaller ones (for the drawer fronts).
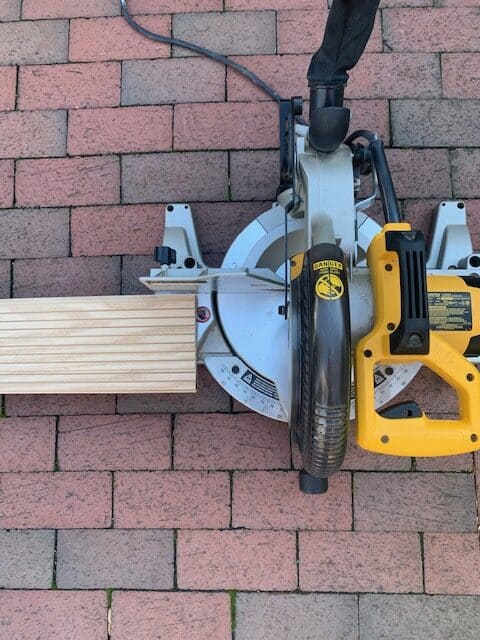
The best cutting tool I used was actually a compound miter saw. If you happen to have one this will work perfectly.
It cut the edges very straight and neatly. I had no trouble cutting the pieces with this saw, and I really didn’t see much wood splintering.
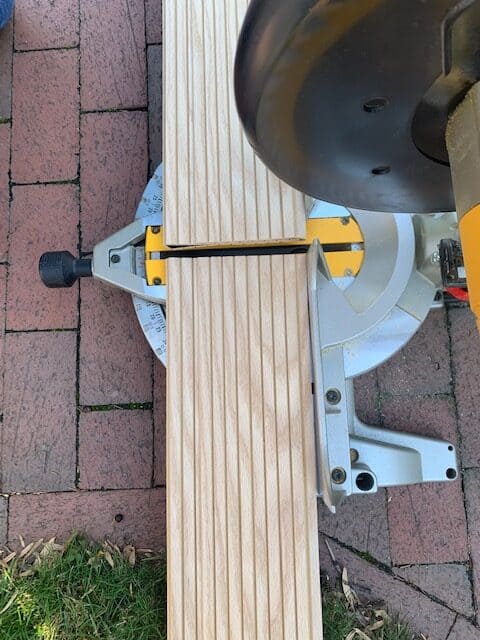
But if you want to be especially careful you can place masking tape or frog tape across the place where you will be cutting to ensure a cleaner and neater cut line.
I cut outside, as there will be small pieces of wood debris and dust flying around.
I also cut the pole wrap folded over, which is actually how the pole wrap comes in the packet.
It makes it must easier to cut it this way, instead of laying the complete piece out flat.
Once you have cut out all the pieces needed, measure them again to make sure they are the right size after being cut. They should be! But if not, just trim them accordingly.
Step Four: Glue the Pole Wrap onto the Vanity Unit
Once all the pieces are cut you are now ready to glue them into place on the vanity unit with the liquid nails.
However, if you cut them right and bought the right size of pole wrap, you will notice that the pieces for each side are just a little bit longer than each side of the vanity unit.
To deal with this, using a razor blade or a craft knife, you should be able to easily slice off the extra rows, by inserting the razor or knife inside the center line parting of the pole wrap between the slats.
I found that about 2 rows needed to be sliced off in order to make the pole wrap fit neatly and evenly onto the side of the unit.
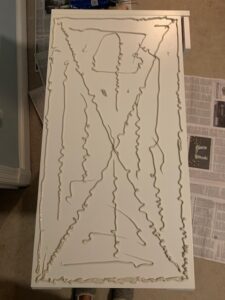
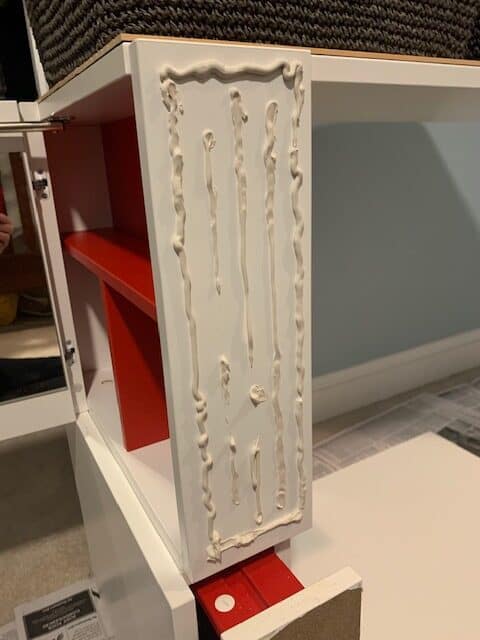
Starting with one of the sides first (turn the vanity unit sideways so that the side you are working on is facing upwards for ease of doing this), squirt the liquid nails all over the actual side of the vanity unit.
Take the liquid nails glue up as close as possible to each edge, to ensure that it sticks well when you place the pole wrap.
Once the glue is all over that side and distributed as evenly as possible, place the piece of pole wrap and slide it into place.
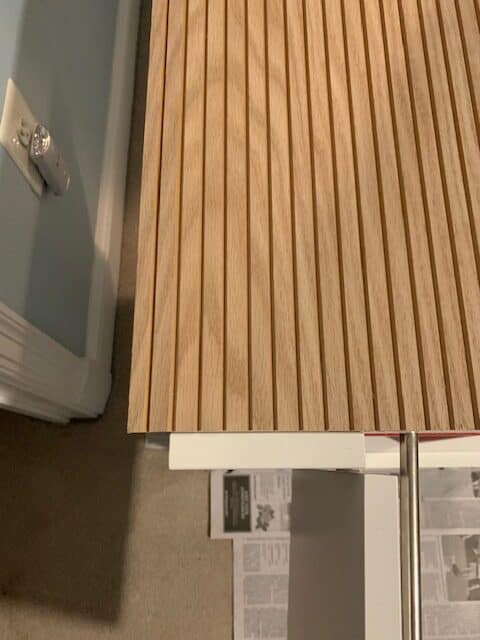
I leveled the pole wrap to sit just underneath the top of the vanity where it hits the side.
There was a tiny small gap visible on each side of the pole wrap – where a tiny slither of white is seen. Barely anything at all, and it certainly doesn’t affect the look of your finished piece.
If you look at the panel on the side in the photo above, that is glued, you will see a lip at the very top of the side.
You are going to be sliding the piece of pole wrap to hit just below that lip. You will be taking the pole wrap right down to the bottom on the side panel (there is no lip at the bottom).
While the glue is still wet, you should be able to easily slide and nudge the panel into place on the side, so that it lines up perfectly.
Some glue will naturally ooze out of the sides, so take a damp cloth and wipe any little oozes away. I also found a Q-tip really useful for this too.
As you place each piece of pole wrap onto the unit it will need to dry before you place the other pieces onto the unit.
Liquid Nails takes about 2 to 3 hours to dry thoroughly. I kept the vanity unit on its side and placed heavy boxes on the top of the pole wrap, so that it was weighted down in order to stick and bond into place more securely.
If you notice any of the individual slats of the pole wrap coming loose, just squeeze a little extra glue to the back of them and place something heavy again on top and leave to dry.
Once you are confident that the first side of pole wrap is completely dry (a couple of hours or so), flip the vanity table over, so that the piece that you just glued is on the very bottom.
This will give it even more pressure to finish drying as you are working on the other side.
With the vanity unit flipped over, you will now have the other side of the unit facing upwards. As you did for the first side, apply the Liquid Nails glue and place the pole wrap onto the side.
Leave this to dry again, with some heavy boxes placed on top. Once again it will be a couple of hours to dry completely.
Step Five: Glue the Pole Wrap onto the Drawer Fronts
Once the sides are secured and dry apply the pole wrap to the front of the drawer on the left hand side of the unit, and to the front that sits beneath the flip up unit on the right.
You are going to be applying the pole wrap so it looks like there are in fact two drawers in the unit.
Measure the pole wrap along the front of the drawer, and also along the front of the ‘fake’ drawer piece on the right (underneath the flip up storage unit).
You may need to cut off a small piece of the pole wrap to get it to sit evenly and neatly. I let the pole wrap go over at each ends slightly.
Make sure that both pieces of pole wrap placed on the two drawer fronts (one fake drawer front) is even and flows into each other, to create the look of one long piece of pole wrap.
Glue each drawer front completely with the Liquid Nails, before placing the pole wrap on to the drawer fronts.
Place one piece of pole wrap on one drawer at a time. Once again you should be able to move and nudge it into place while the glue is still wet.
Once you have applied the pole wrap to each drawer front, let it dry completely.
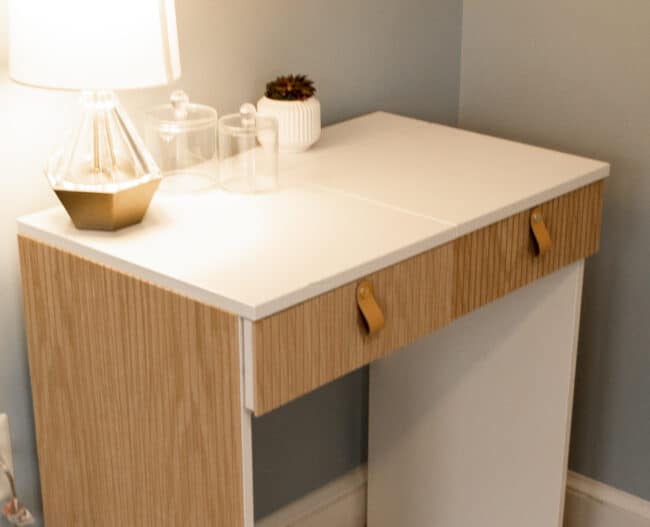
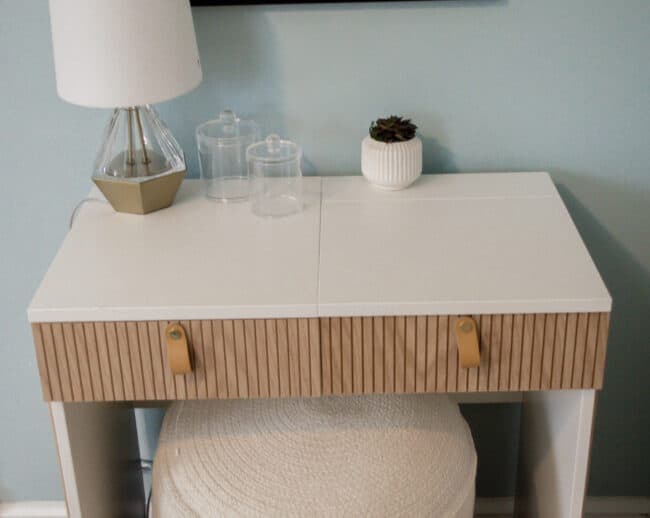
The photo below shows that the pole wrap is running along the drawer fronts neatly together, and flowing together, so it looks evenly like one long strip.
Step Six: Sand Down the Edges
No matter how carefully you cut the edges of the pole wrap, you may get a little bit of splintering of the wood. This won’t be much, but you want your finished piece to look perfect!
With a sanding block or sand paper just lightly sand the edges where any splintering may occur.
Step Seven: Apply the Handles
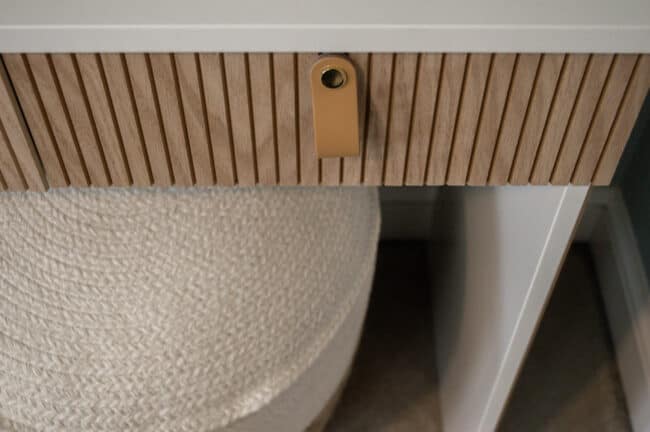
For handles I really love the look of the leather cabinet pulls. I felt these in a lighter brown leather would go well with the wood tone of the fluting on the vanity desk.
I used these leather cabinet drawer pulls.

You will need to mark the center of both the drawer on the left, and also the center of the other ‘fake’ drawer (storage compartment) on the right.
You want them both to appear to be drawers on the finished vanity table, even though only one is an actual drawer.
Measure the drawer and find the center. It should be around the 7 inches point on the drawer.
Place some masking tape or frog tape on the back of the drawer, so that when you push the drill bit through you will be less likely to damage the inside.
You will need to drill through the pole wrap front of the drawer, right through to the back, so that the screw that comes with the leather cabinet pull can fit through.
I started out by using a smaller pilot drill bit to make the hole completely through from one side to the other, which was 1/16″.
Because the screw was larger I then switched to a 5/32″ drill bit. Make the hole go completely through the drawer front where you measured it.
Push the screw that came with each drawer pull through the hole from back to front.
Now place the leather cabinet pull onto the screw in front, and place the metal disk to seal on the top. It will be snug – I found that the pulls were very snug on the screw.
You will not be using the leather pull on the right hand side “fake” drawer at all – it is just there for decoration and an even look.
Related: Amazing IKEA Hacks you can do in a Weekend!
Related: IKEA Mid Century Modern Hacks
Pin this for later!
The IKEA Brimnes vanity table is a petite vanity table with a lots of storage room. In this hack I have turned it into a pretty Scandi-style fluted vanity table.
This is so pretty! What a great weekend project.
Thank you so much Anna! It is indeed the perfect weekend project!