
How to set up & use your new Cricut Explore Air
Your new Cricut Explore Air machine just arrived! So how do you get it hooked up, and set up for it’s first use?! Follow the step by step guide here and start using this amazing machine!
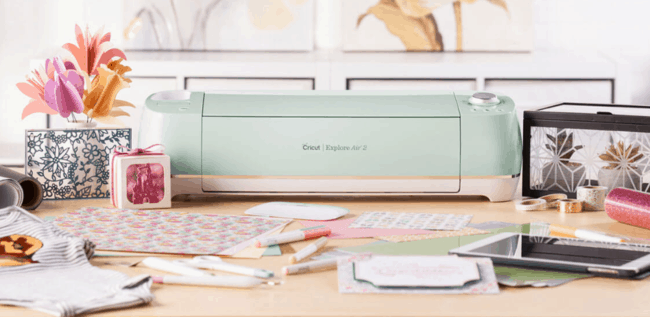
Your Cricut Explore Air machine is going to open you up to a world of new crafting and DIY possibilities! There is nothing more exciting than getting a new machine to use and play with!
But once you get your new Cricut, and unbox it, it can look pretty intimidating! You don’t want to spend hours researching and learning how to get it all hooked up, and set up for its first use!
So here is my step by step guide on how to set up your new Cricut Explore Air machine once you first take it out of the box!
![]()
Cricut Explore Air is available from many places, including directly from Cricut, and also from Amazon. If you haven’t yet bought your Cricut machine, shop around for the best price!
What is in the Box?
Once you open the box, below the Cricut machine you will see several items in the bottom of your box:
12 x 12 cutting mat
Sketch pen
Power Cord
USB connection cord
Warranty booklet & quick ideas guide
There are no actual instructions to setting up and using the machine in the box. This is one of the reasons I wanted to do this tutorial here for you! (there are some brief explanations inside the back of the manual, but nothing that in-depth).
An In-Depth Look at the Cricut Explore Air Machine
Once you pull your new machine out of the box you get a good look at it! Beautiful isn’t it! I don’t know what color you decided to go with, but mine is a lovely blue shade – denim blue.
Take a few minutes to familiarize yourself with the Explore Air.
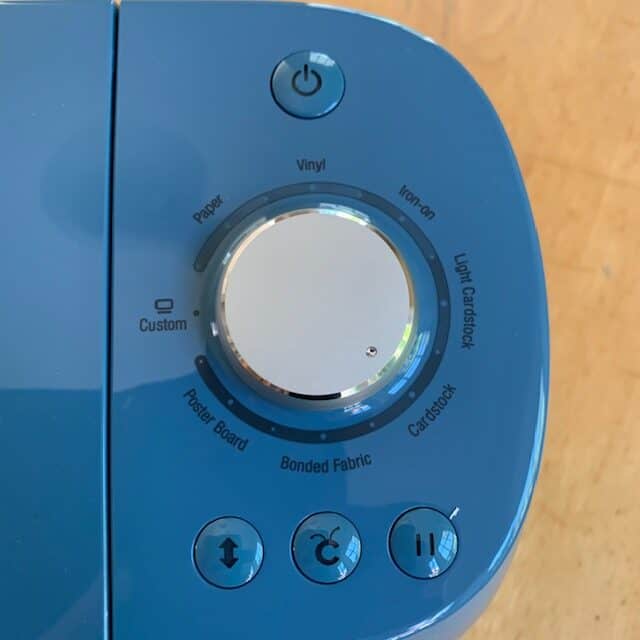
On the right side of your machine are the controls. The power button is right on top, and then you have a material dial in the middle (for different fabrics, cardstock and paper etc). You also have load/unload, cut and pause buttons (in that order).
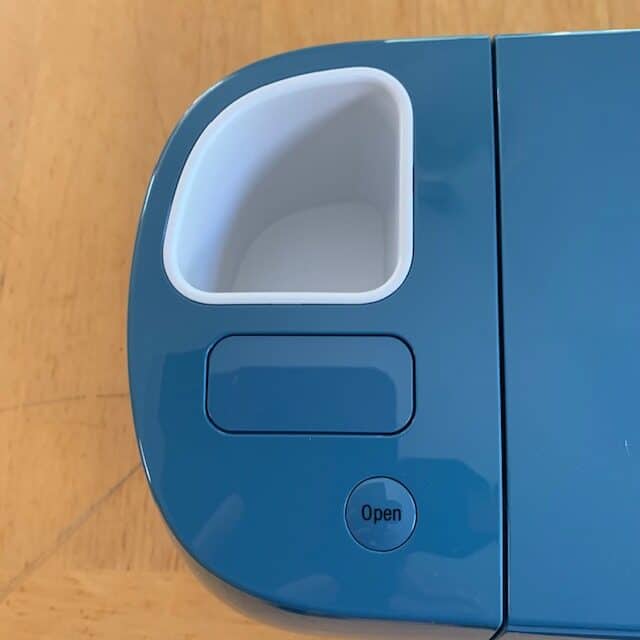
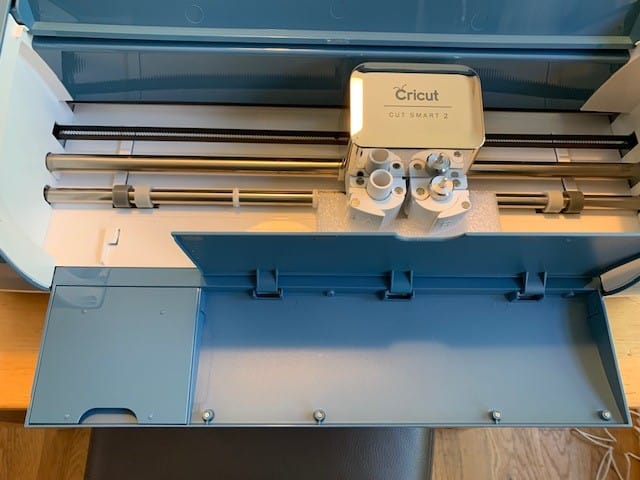
On the left hand side of the machine there is a little storage area for your tools. There is also a port for cartridges, and at the bottom there is an Open button (this is to open the machine up).
Once your machine is opened, you can see inside the machine. Below is what the inside looks like (note, your new machine will have a little piece of foam around the controls to protect them in transit etc – remove that before using your machine).
This inside part of the machine is the blade housing part of your machine. The blade is all set up and ready to go already! Which is great.
There is also a light inside that blade housing part, so if you need to work in dimmer light it will help you out!
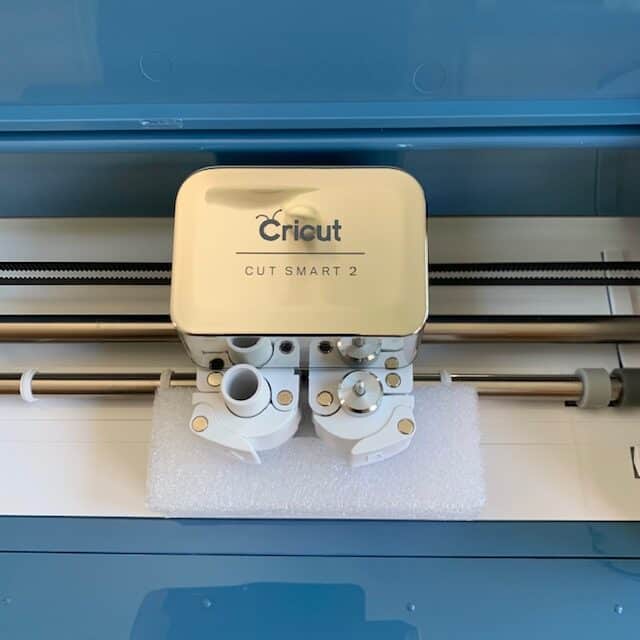
Those two white roundish pieces of plastic that you see in the blade hosting area are actually marked A and B (A is on the left). A is for the accessories that came with your machine in the box, and B is for the blade (which is already inserted).
Note: In the photo above, you can see the white square foam piece of material that is on your machine to protect the blade area when you first receive it. Make sure you remove that before use.
There are also two storage spots within the front pull down cover. A smaller compartment on the left, and a larger one on the right These are used to store scraps of fabric and tools.
How to Hook Up & Start Using Cricut Explore
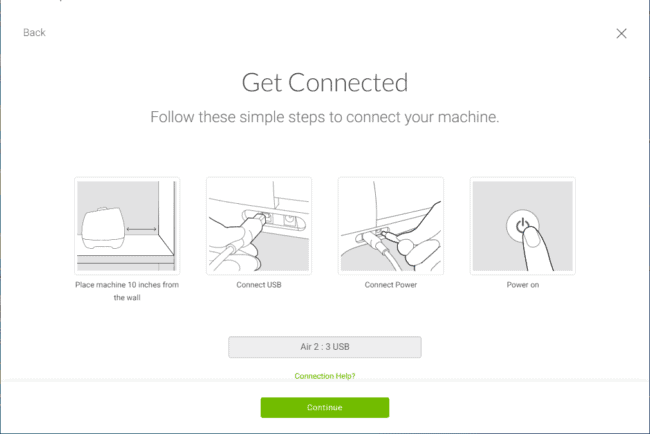
The first thing you need to do is plug in your machine, and power it on (note: you will need to press and hold the on/off button for a few seconds to power on).
You can now either connect the Cricut machine to your computer using the USB port, or you can pair it with Bluetooth (the ‘Air” in the name of this machine refers to its Bluetooth connectivity).
The fastest way to use your machine is probably to use the USB port. But the Bluetooth option will certainly give you more ease of use. You will find what works better for you.
For the purposes of this tutorial, I am only covering the USB set-up.
On the back of the machine there are two ports:
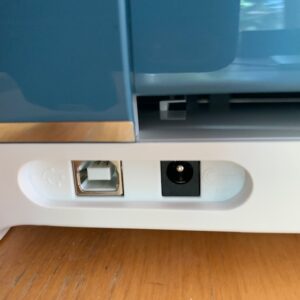
The port on the left is the USB port. The port on the right (round port) is the power cord port.
The USB power cord comes separately with the machine, and will be in the box underneath your machine:
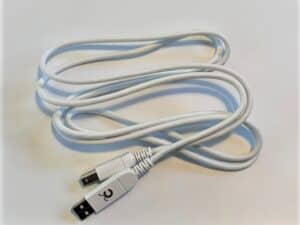
To use the USB power cord with your machine, plug the smaller end of the USB cord into your machine. The bigger end plugs directly into your computer into the USB port.
The power cord plugs directly into the round port on the right, and then into a power source plug socket in your home.
How to Set-up Cricut Explore Air on your Computer
Once you have your machine all plugged in, you are ready to go. But I bet you are now looking at it and feeling a little intimidated?!
The next step is to get your machine set up on your computer, so your computer will recognize your device.
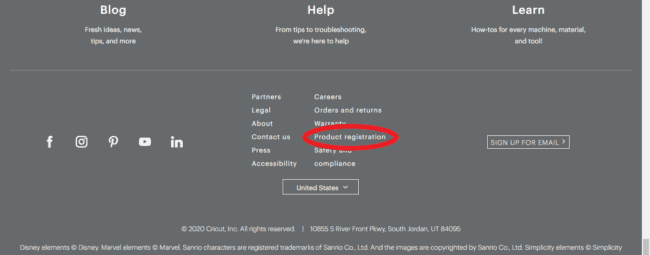
Go to the Cricut website to do this.
Scroll all the way down to the bottom of the page, to the menu in the footer. You need to select Product Registration.
This will take you to the following Sign In page:

You can sign in here if you already created a Cricut ID. If you haven’t, just click on the right, where it says “Create a Cricut ID”
You now need to link your machine to the software. Note: In order to do this, you either need to have the machine hooked to your computer with the USB cord, or you need to have set up the Bluetooth connection.
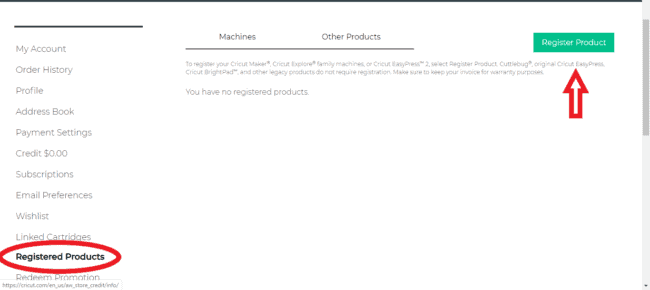
On your Account page in the left hand side menu, there is an option for Registered Products.
If you have not previously registered a product, there will be a green box on the right hand side to Register a Product (note: when you set up your machine it automatically registers it, so this part will do both).
This will now take you to the Design Space page:
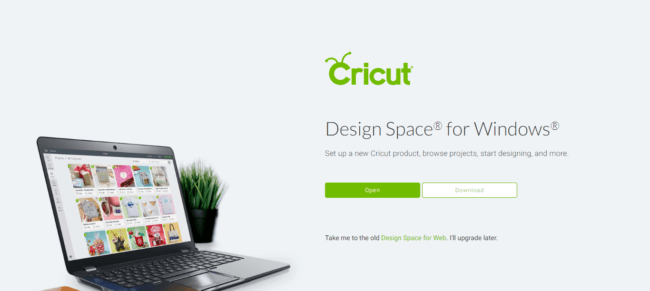
Click on download to download the desktop app.
Once the green desktop app is downloaded on your computer desktop, double click it to open and install it.

You are now in the Design Space software. Click on the green Machine Set-up button.
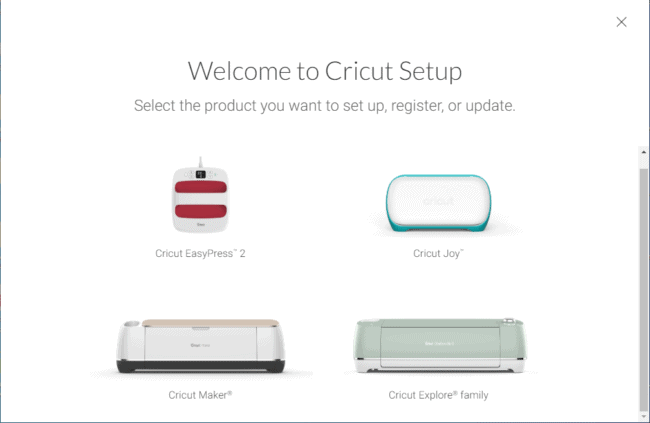
You are now given a choice of what Cricut machine you are setting up. You are setting up the Cricut Explore, so click on the Cricut Explore family icon.
You will now follow the steps on the screen to get your machine all set up. If you haven’t already connected your machine with the USB cord to your computer do it now (or set up your Bluetooth connectivity).
Cricut will now locate your machine. Once it is set up it will give you the option to click the green Continue button. As you can see from the example above, it is telling me that my machine is set up via USB.
Once you have clicked on continue, you will be taken through a cutting tutorial to test your machine for the first time.
Note: you will be placing cardstock on the cutting mat for this. The clear plastic should be removed from the cutting mat in order to do this (the plastic is only there to protect the stickiness of the cutting mat, and should be replaced back on the mat after each use).
If you did everything right (which is pretty easy to do!), you should now have a great sample cut out that your new machine just did!
See more about the Cricut Explore Air here
Not sure which Cricut machine is best for you? Check out my guide here!
Get Incredibly Creative with a Cricut
Your new Cricut Explore Air machine just arrived! So how do you get it hooked up, and set up for it’s first use?! Follow the step by step guide here and start using this amazing machine!