Yarn Felting for Beginners
Yarn felting makes some lovely knitted & crocheted projects. It is actually very simple to do, once you know the technique.
Felted knitted items have a unique look to them, and they are sturdier and stronger than their traditionally knitted and crocheted counterparts.
Felting looks difficult, but is actually very easy. It just requires a little bit of time, and then you will have an amazing felted object or item to use or wear!
You can make such wonderful items through felting, such as these women’s felted slippers, baby shoes, market/tote bag, and even a little felted bird. There is no end to the things you can knit and felt!
This post contains affiliate links. You can view my disclosures here.
What is Yarn Felting?
Yarn Felting is a craft that takes knitting or crochet, and agitates it in hot water. This agitating is usually done by something such as putting the knitting or crochet into a washing machine.
The process of agitating the knitting in hot water makes the natural fibers expand and stick together, therefore causing the ‘felting’
A felted piece of knitting shows absolutely no stitches. It is a solid piece of fabric that is produced, which is thick and dense.
Yarn felting does actually shrink your knitting. Therefore whatever you knit first will be much smaller once it has been felted.
How to Felt Yarn
1.Knit or crochet your item of choice. Natural wool is better for felting, see the guide to wools that are better for felting below.
2. Put your knitting or crochet into the washing machine. Add a couple of towels that will agitate your knitting or crochet more as it turns.
Set the washing machine to the hottest cycle possible. It is best to set your machine to do a quick wash for around 5 minutes at a time. Also set your machine on the lowest water level if possible. After each 5 minutes is up, check your piece to see how well it is felting.
You may need to stretch or reshape the piece. Continue placing back in the machine until it is felted how you want it. Usually total felting time is around 20 minutes or so.
Some people like to place their knitting inside a bag, when they place it inside the machine. You could use a mesh laundry bag for this, or even a pillowcase (zipped top is best). This is especially useful if you are felting more than one item at a time. This will also prevent pieces of felted wool clogging up your washing machine.
You may or may not want to use a detergent or wool wash in your washing machine also. You can successfully felt in your washing machine without any detergent or wool wash. It is less messy if you use nothing at all, and it really doesn’t seem to matter whether you wash your piece or not. But if you do use detergent or wool wash, only use a small amount, just a squirt. There are also some who like to use a little baking soda in the wash for felting, instead of detergent.
If you don’t have a washing machine you can just fill a large bowl with really hot water. Add a wool wash to the water that does not require rinsing. With your hands (using protective rubber gloves), agitate the item by hand. Agitate it as a washing machine would – move it around, and rub it against other parts of the piece. But be careful – the water is going to be very hot.
It will take longer to felt by hand, but it is just as effective.
3. Once you are happy with your felted piece, you will need to rinse it and remove all the water.
If you are felting in a washing machine, just run the drain and spin final cycle of your machine.
If you are felting by hand, squeeze out all the water as best as you can. You can then wrap the piece in towels and pat and squeeze out even more water.
4. You will need to reshape (block) your piece while it is still damp. Depending on what item or article you are making, stretch and pull your piece into the felted shape that you need.
5. Now place your felted items to dry. This must be done in an area that has good air circulation and ventilation, as you don’t want your finished piece to smell moldy and musty. Drying can take a little bit of time, depending on how thick the item is.
6. Once the piece is fully dry, you can finish the item off. Trim off with scissors any fuzzy parts from your item. You an also trim with scissors and shape it more.
You can also take a class in felting, which will cover all kinds of projects and how to make them.
Wools that are Better for Felting
Some colors of wool felt better than others. Really light colors and especially white colored wools are more difficult to felt. Colored wools felt far better.
Real wool, animal fibers, are much better for felting. This Sheep Wool works really well for felting. As does this 100% Merino Wool.
Start a Great Felting Project
Here are some great felting projects that I have found that you may be interested in attempting!
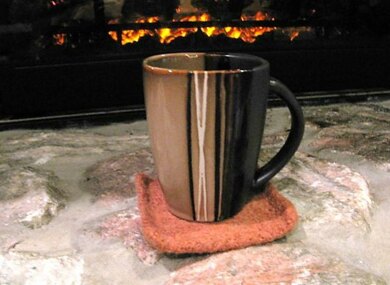
Felt Coasters
These felt coasters would be a great first felting project. They are small and easy to make, and this project will get you initiated into the world of felting! You can get the pattern right here.
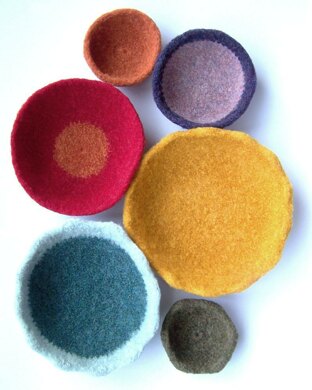
Fast & Fun Felted Bowls
These felt bowls are fast and easy to make, and would make a great beginning felting project. These are crocheted, not knitted. You can get the pattern here.
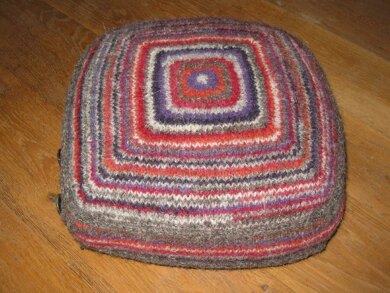
Felted Cushion
This cushion cover is knitted in the round. It makes a lovely knitted cushion that is then felted and finished. You can get the pattern right here.
Felting is a great knitting and crochet project that is far easier to do than it looks! Take on a great craft project with felting!
You will also like these knitting posts:
6 Tips for Faster Knitting when you don’t have the time to knit
