
DIY Vintage look picture frames
The Vintage ‘distressed’ look is very popular right now and can really add an interesting touch/feature to your home. I personally love to take something old or used and to make it look and work better and nicer than it was.
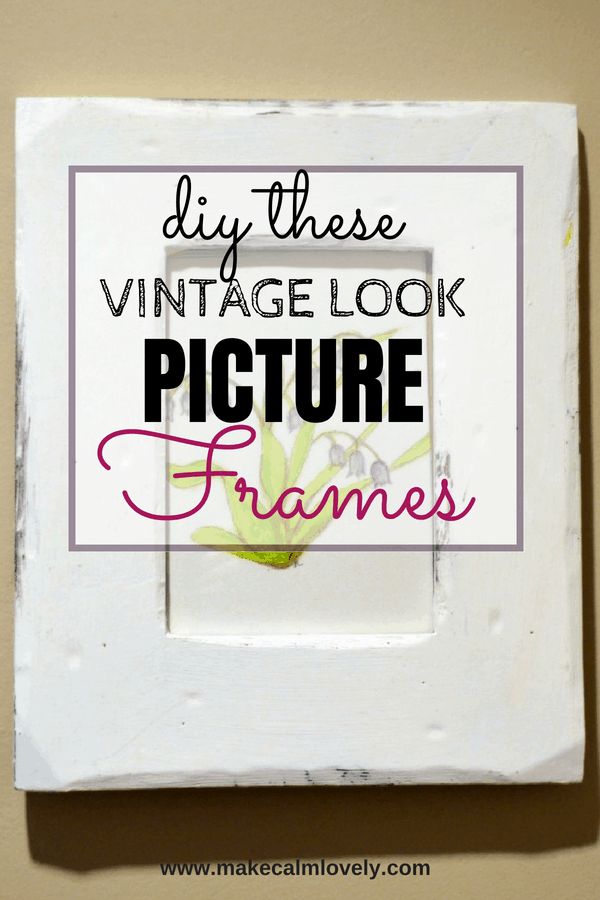
These picture frames are a great example of that – I just took old boring looking wooden frames, and painted and ‘distressed’ them a little.

This is a really easy DIY that doesn’t need a lot of supplies or any skill at all. In fact, this is a great DIY project if you think you aren’t good at DIY! as there really isn’t anything that you can do that isn’t right! In fact doing this ‘wrong’ will only add to the effect that you are aiming for!
Supplies needed:
Wooden picture/photo frames (any kind of wood or shade/colour of wood will do)
Paint (I used white chalk paint but any paint will do)
Sandpaper
Wooden photo/picture frames can be purchased just about anywhere. You don’t need to pay a lot for these frames – thrift stores and dollar stores may even have them.
It really doesn’t matter what condition they are in – because you are going to ‘distress’ them anyway! You probably also have some old frames around your house somewhere that can be found up and used for this.
First of all – take the frame and run the sandpaper over the entire frame. This will prepare the frame for painting. If you gouge out a couple of nicks in the wood it will look even more ‘distressed’.
I ‘roughed’ up the outside edges of the frames also, as any old frame would be sure to have some damage to the outside edges. Some of the wood underneath will show through, and that’s ok, it adds perfectly to the look you are going for.
I also roughed up the inside piece of the frame, where the photo/picture will be shown. (Take a look at the photos in this post for ideas and guidance).
Once you have done a preliminary sand down with the sandpaper, wipe over the frame with a very slightly damp cloth to get rid of any dust that may have accumulated.
If the frame is left a little damp after this step, make sure you allow it to dry before you go to the next step of painting the frame.
You may want to wipe over the frame with a dry cloth to make sure there is no damp on the frame. Sanding dust will accumulate in the paint on your paintbrush if it is not swept away.
Using the paint and paint colour of your choice, proceed to paint the frame. With the chalk paint that I used I only needed one coat.
You can do two coats, or leave it at one coat with whatever paint you choose. Just see what you think of the look once you have completed the first coat.
The effect needs to be imperfect, so don’t go for a perfect paint finish. Chalk paint has a harder finish to it, and I liked that as when I sanded it and created imperfections in the frame I could control them better, but chalk paint isn’t essential.
You don’t want the finish to look pristine – it needs to look old and well used. Leave the painted frame to dry, but not for too long, as the paint will set too much and be harder to sand down again.
Just leave it for long enough for the paint to be just dry (around an hour or so is probably adequate. Just test with your fingertips periodically to see how dry the paint is).
The painted frame should be completely dry when you sand it again in the next step.
Sand the frame down once again over the painted frame in patches. Don’t sand down the entire frame, just sand certain patches over the painted frame to add to the distressed effect.
Wipe down the frame once again with a slightly damp cloth to get rid of any dust that may have accumulated. Be careful with how wet the cloth is that you use to wipe the frame down in this step, as the frame has now been painted.
Leave the completed, painted frame to really dry overnight for a very thorough dry if possible before using. Once completely dry, insert the picture or photo of your choice into the frame.
You could choose to ‘distress’ the frame more once it is dry if you want it to look even more ‘beat up’ and distressed.
Just remember – this doesn’t have to be perfect! You are certainly not going for perfection in this DIY project, so just enjoy doing it, and enjoy your finished results!
Send me your photos of your ‘distressed’ frames. I would love to see them!
(this bluebell picture was my first attempt at a watercolor!….)

