
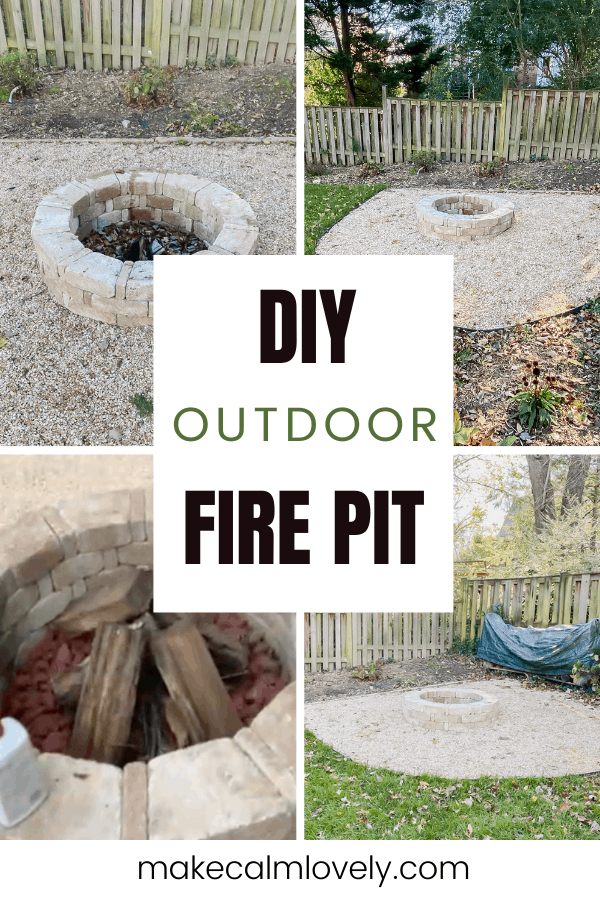
Outdoor Fire Pit Weekend DIY Project
A backyard fire pit will provide a great area for outdoor entertaining, especially during the cold weather. This fire pit is an easy DIY project that you can easily do in a weekend
If you are looking for a way to entertain and spend more time outdoors right now, building a backyard fire pit will allow you to spend time outside all through the colder months (and the warmer ones too!).
With the weather getting colder, it is hard to gather outdoors without heating devices. So building a fire pit in your back yard will not only provide much needed heating, it also becomes a great focus piece to gather around.
You can easily build a fire pit in just one weekend. Building a fire pit is actually easier than you imagine it to be. The hardest part is actually all the hauling of materials from the store to your home!
I had wanted a fire pit for some time, and luckily my son arrived home from college in the summer, and was eager to have a fire pit that he could also use himself! So he offered to help build the entire thing! I was luckily able to enlist him and a friend to help with all the heavy work!
Here is how we built the fire pit, with tips on how to build your own.
Pick a Good Spot in your Garden/Yard
Pick a spot in your backyard that will work well for a fire pit. You don’t want to place it under any trees, or have anything nearby that can easily burn.
Choose a comfortable area of your backyard where you can relax for your fire pit. It should ideally be enough distance away from your home in case of smoke and odor from the fire.
We chose an area at the very back of our backyard for the placement of our fire pit. We had to place it onto grass, so the grass had to be removed in that area, to create not just the fire pit base, but also a seating area around it.

Decide on your Materials
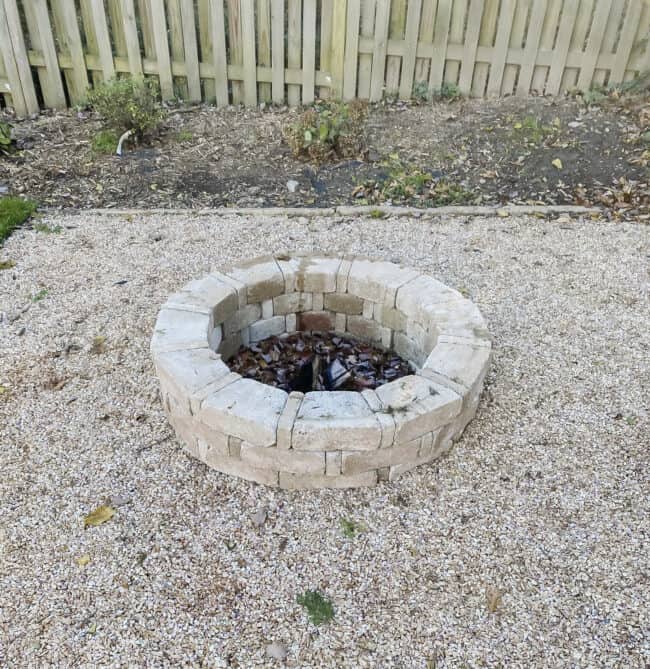
Decide on the materials that you will build your fire pit with. We used radiused concrete blocks in 2 different sizes. They were easily available at our local Home Depot.
Radiused concrete blocks are curved concrete blocks, which create a circle shape to the pit.
The blocks we used were Pavestone RumbleStone Trap blocks that were sized 3.5 x 10.25 x 7 inches. We used 48 of these blocks. We also used 48 RumbleStone Mini 7 inch x 3.5 inch x 1.75 inch blocks. Ours were in the Merriam color, but the blocks come in around 5 or 6 different color shades.
We determined the overall radius of the fire pit by the blocks. Our pit measures 45.5 inches across, and we stacked the blocks 4 high in height.
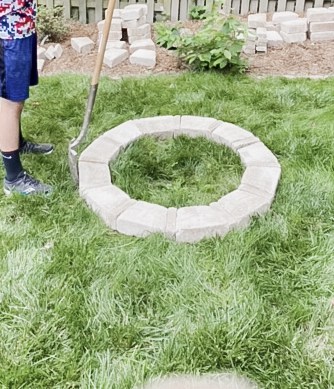
Stake out the Fire Pit
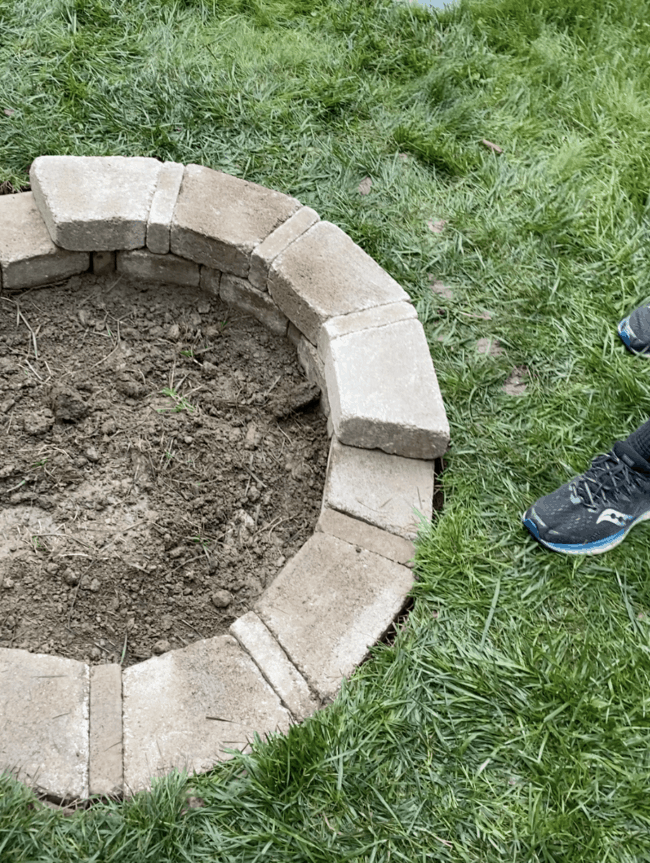
We staked/measured out the fire pit on the ground by loosely placing the blocks to see how it would look first.
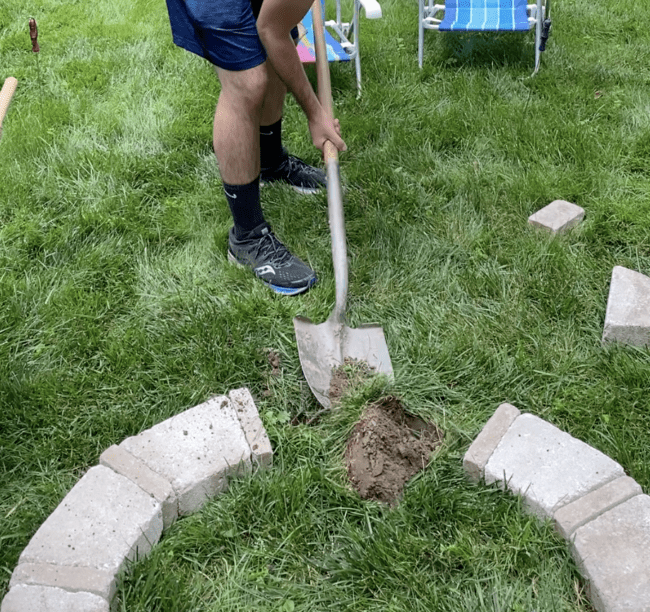
We then removed the grass to expose the earth in the area that the actual fire pit would be.
Next we dug a hole that was deeper on one side, as we had a sloped garden to work with.
We put in one block high on the shallower side completely into the ground, and on the deeper side it was more than one block course deep.
On the shallower side we wanted it to be one block deep so it would hold the earth back. If you have a flat surface to work on you won’t of course need to take account for that.
We leveled it out by placing the blocks and used a spirit level (a 3 foot long spirit level) as we placed the blocks. We used a rubber mallet to hammer the blocks down into the ground to make it even.
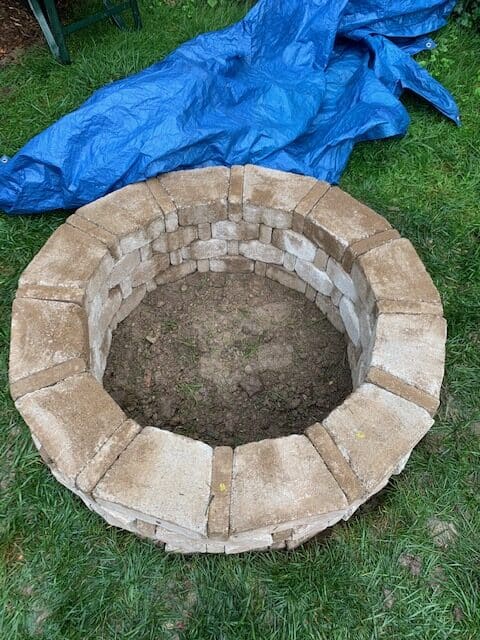
We then decided how tall to make the fire pit, taking into account the slope of the lawn that we had to deal with. Ours is a total of 4 blocks high.
We laid the first level of blocks directly onto the earth/dirt and proceeded to level the ground with a spirit level, by removing more dirt on the uphill side than the downhill side. Once again if you have a flat surface you can make this more even.
Once the first course of blocks was level, we then stacked the remaining blocks on top. We chose to make our pit 4 blocks high all the way up, making sure to off-set the joints as we went up for stability.
We did not place a floor for our fire pit. We just used the dirt that had been exposed. We put in lava rocks later, and these can go straight onto the dirt bottom.
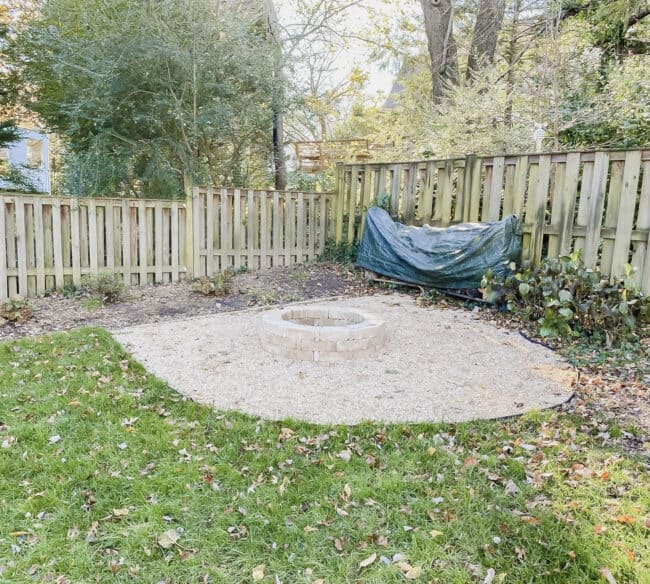
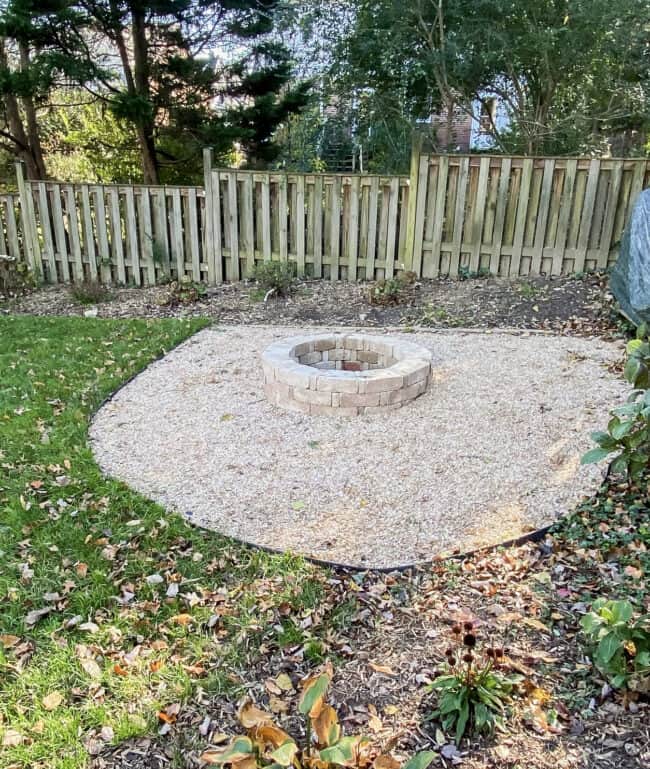
Stake out the Seating Area Around the Pit
If you want a seating area around your pit that is not grass (if you are building on top of grass), you will also need to stake out that area and remove the grass if you have it. Once that was staked out we decided on pea pebbles for our seating area.
We purchased bags of pea pebbles and a roll of geo-textile fabric to place under the pea pebbles, so that the gravel stays above the earth and doesn’t sink in, and also weeds are minimized and kept under control.
We purchased a plastic edging to go around the entire seating area, that used spikes that made it easy to place. We nailed the fabric a little with the stakes underneath the divider. We dumped the pea pebbles onto the fabric, and spread them around right up to the edging.
We purchased lava rocks for inside the fire pit. They are known to help more with the flow of fire in the fire pit. They are porous so they allow for more air flow.
Fire Pit Project Total List of Supplies
RumbleStone Mini Blocks (7 inch x 3.5 inch x 1.75 inch) – 48 blocks.
RumbleStone Trap Blocks (3.5 x 10.25 x 7 inches) – 48 blocks.
Pea Pebbles – 12 5cu/ft bags.
Metal stakes – pack of 12.
Lava Rock – 2 x 7lb bags.
Geotextile fabric – this is a weedblock landscape fabric. About 1 roll.
Spirit Level – 3 Foot long
Wooden Mallet/Hammer
In total we spent around $278 on the fire pit. Having help with the labor was of course invaluable! It is fairly back breaking heavy work, but it is actually a relatively easy DIY project that you can do even if you don’t consider yourself any good at DIY!
A fire pit should last years and years for your family. Entertain and enjoy the outdoors all winter long with a home made fire pit.

A backyard fire pit will provide a great area for outdoor entertaining, especially during the cold weather. This fire pit is an easy DIY project that you can easily do in a weekend