
How to Design & Create Polymer Clay Earrings
Learn how to design and create beautiful unique polymer clay statement Earrings step by step!
This post will show you how to create fabulous unique earrings out of polymer clay.
With polymer clay you can also create necklaces, beads, and many other kinds of jewelry.
Polymer clay can create some amazing statement jewelry in a variety of colors and shapes. You can choose colors that you love, create unique designs, color combinations and more!
This post contains affiliate links. This means that if you click on a link in this post and make a purchase via that link I may receive a small commission, at absolutely no additional cost to you.
Polymer Clay for Creating Earrings
There are many different types of polymer clay available for purchase that you can use for earring and jewelry making.
However, the best brand of polymer clay to use for making jewelry is Sculpey. They have several different lines – Sculpey Souffle and Sculpey Premo are the best for earring and jewelry making.
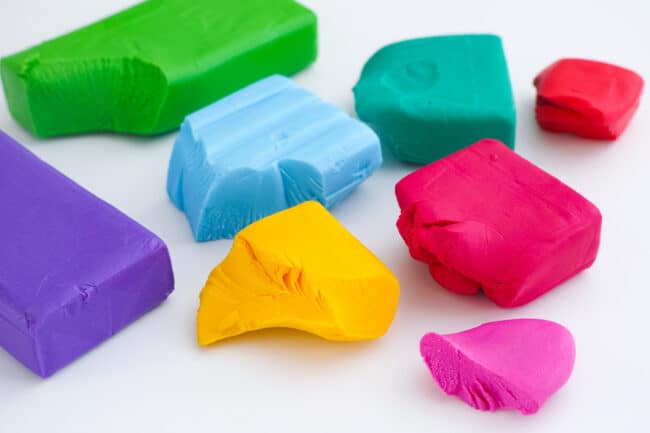
Sculpey Souffle and Sculpey Premo are soft clays that are wonderful for jewelry making. They are easy to work with, come in a wide variety of colors (you can also blend them to create your own colors), and they bake beautifully.
Tools Needed to Create Polymer Clay Earrings
Tile Surface
A ceramic tile is the perfect surface for working on and cutting the polymer clay. Choose a tile that is matte, not shiny. Clay will stick and adhere to a shiny tile surface. You can purchase single ceramic tiles in most hardware stores.
Clay Cutters
Clay cutters are available from online places such as Etsy. There are many different types and sizes of clay cutters, so choose the ones that you need for your particular piece of jewelry and earrings that you are creating.
You may want to use a set clay cutter for a particular design. But the better option is to purchase a set of assorted cookie cutters in all shapes and sizes for many different projects you may do.
If you do not have clay cutters to use you can make your own stencils using card stock. You can either draw designs on the card stock freehand and cut out, or print a design on the card stock and then cut out.
Acrylic Roller
An Acrylic roller is a smoother non-stick surface roller to roll out clay, so that no indents, scratches etc appear in the clay as could happen with a wooden roller.
Depth Guides
Depth guides are used to guide the roller to make the clay smooth, flat and even all over. You don’t need to use these, but they are particularly good for making sure the clay is the same width and even, which is important in jewelry making.
Tissue Blade
A tissue blade is a flat cutting tool that is used to remove clay from the tile once the clay pieces have been cut.
xacto Knife
An xacto knife is used to cut around clay, for detail work, and also to pop any bubble that may happen as you are working with clay.
Texturing Tools
If you want to make textured patterns in the clay. You can use texture plates that are rolled into the clay, stamps, clay rollers, texturing tools, or even a sanding sponge.
Pasta Machine
A pasta machine can roll out your clay. It will roll and out and condition clay. Any pasta machine can be used for this.
A pasta machine makes conditioning clay, and also blending clay colors, so much easier. You are also less likely to get bubbles in the clay while you are working with it.
Gloves
Gloves are optional to use. But using gloves means that clay always stays clean, especially if you are working with different colored clays. It is especially good to wear gloves when working with white clay and also black clay.
Cotton Buds/Q-Tips
These can remove any dirt or lint that gets into the clay as you work with it, and also can be used to apply acetone to clean the clay etc.
Extruder
An extruder is a tool that creates noodles of clay. You feed a sausage shape of clay into the extruder tunnel, and it pumps out clay noodles. It is much easier than rolling noodles by hand, and the noodles will also be the same width throughout.
Sanding Sponge
This is used to sand down the clay pieces once they have been baked, so that the surfaces and edges are smooth and even.
Stylo Dremel
A Stylo Dremel is a small drilling/sanding tool. It comes with different drill bits for creating different sized holes. It also comes with sanding bits for sanding down your baked and finished pieces of clay (instead of hand sanding)
Pliers
Pliers are used to attach the hooks and pieces to your jewelry, such as jump rings.
Sculpey Liquid Clay
Sculpey Liquid Clay is the glue of choice for creating polymer clay jewelry. It dries clear and invisible and it holds posts etc in place strongly.
Safety Equipment
When sanding eye protector glasses and a face mask are recommended.
Step One: Decide What Earrings you are going to Create
Depending on what type of earrings that you want to create you will need different tools, and different sized cutters etc.
Decide what you are creating. It may help to draw a sketch out of what you want to create beforehand.
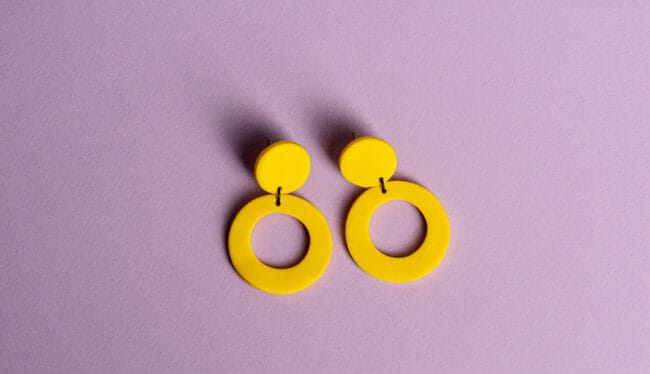
Earrings can come in all shapes and sizes – circles, geometric shapes, squares, organic shapes and so many more.
Choose your Clay Color Palette
Choose the clay colors that you want to use for your earrings. A good way to do this is to choose 3 words first that sum up what type of jewelry you are trying to create.
You may want to create a fun piece, a happy piece, a retro piece, a playful piece etc. So choose 3 words that sum up what you are trying to create with this piece of jewelry – and write them down.
Once you know what you are trying to create with words – select colors that match what you are trying to create.
These are the most common colors that match moods:
Fun – bright colors such as reds, yellows etc
Playful – bright colors such as primary reds, yellows etc
Calm – colors such as blues and greens
See here for a guide to colors and the emotions they invoke
A color wheel is very helpful in choosing colors, so are paint chips from hardware stores, and also color selections such as from Pantone.
Polymer clay comes in set colors, and although they have an extensive selection of different colors, there may not be the color that you need and want.
It is entirely possible to create your own colors in polymer clay. There are several ways to do this, but the most common way is to combine different colored clays to get the color that you want.
Read here for all about how to mix polymer clay colors and how to select colors
How to Prepare Polymer Clay with a Pasta Roller
A pasta roller is the best way to soften and blend polymer clay. You can hand blend by hammering the clay and rolling and twisting the clay, but a pasta machine will just do the job so much better and take far less time.
Make sure the piece of clay is rolled flat. Use the pasta machine at the widest setting. Fold the piece of clay in half, keeping the crease on the side or the bottom, and feed it through the roller.
Keep folding and replacing inside the roller. Using a pasta machine prepares your clay to work with and makes it soft and usable. You have to condition clay every time you use it.
Polymer Clay Pattern Techniques
Terrazzo Clay Jewelry Patterns
To make beautiful and colorful earrings and jewelry there are several techniques that can be used to create patterns and textures.
You can create a terrazzo pattern by taking tiny pieces of different colored clay and placing them onto your pre-rolled and prepared clay.
Place one color piece at a time onto the prepared clay. Then using the acrylic roller, roll over the clay to smoosh the clay pieces down into the base clay, so that it all becomes smooth and even.
You can also strategically cut out shapes and pieces of clay to use to place onto the clay base. This is especially good to do if you are trying for a geometric terrazzo look and pattern.
Striped Clay Patterns
Use an extruder to push out colored noodles. You can also hand roll out noodles too. To use an extruder just roll out clay into a sausage shape, and feed it into the extruder tube.
To make a striped pattern place the noodles in the order you want them onto the base clay.
Roll over with an acrylic roller to adhere them all gently to the base clay. Try to keep the lines as straight as possible. You can make the stripes flat or you can have them slightly raised to create texture.
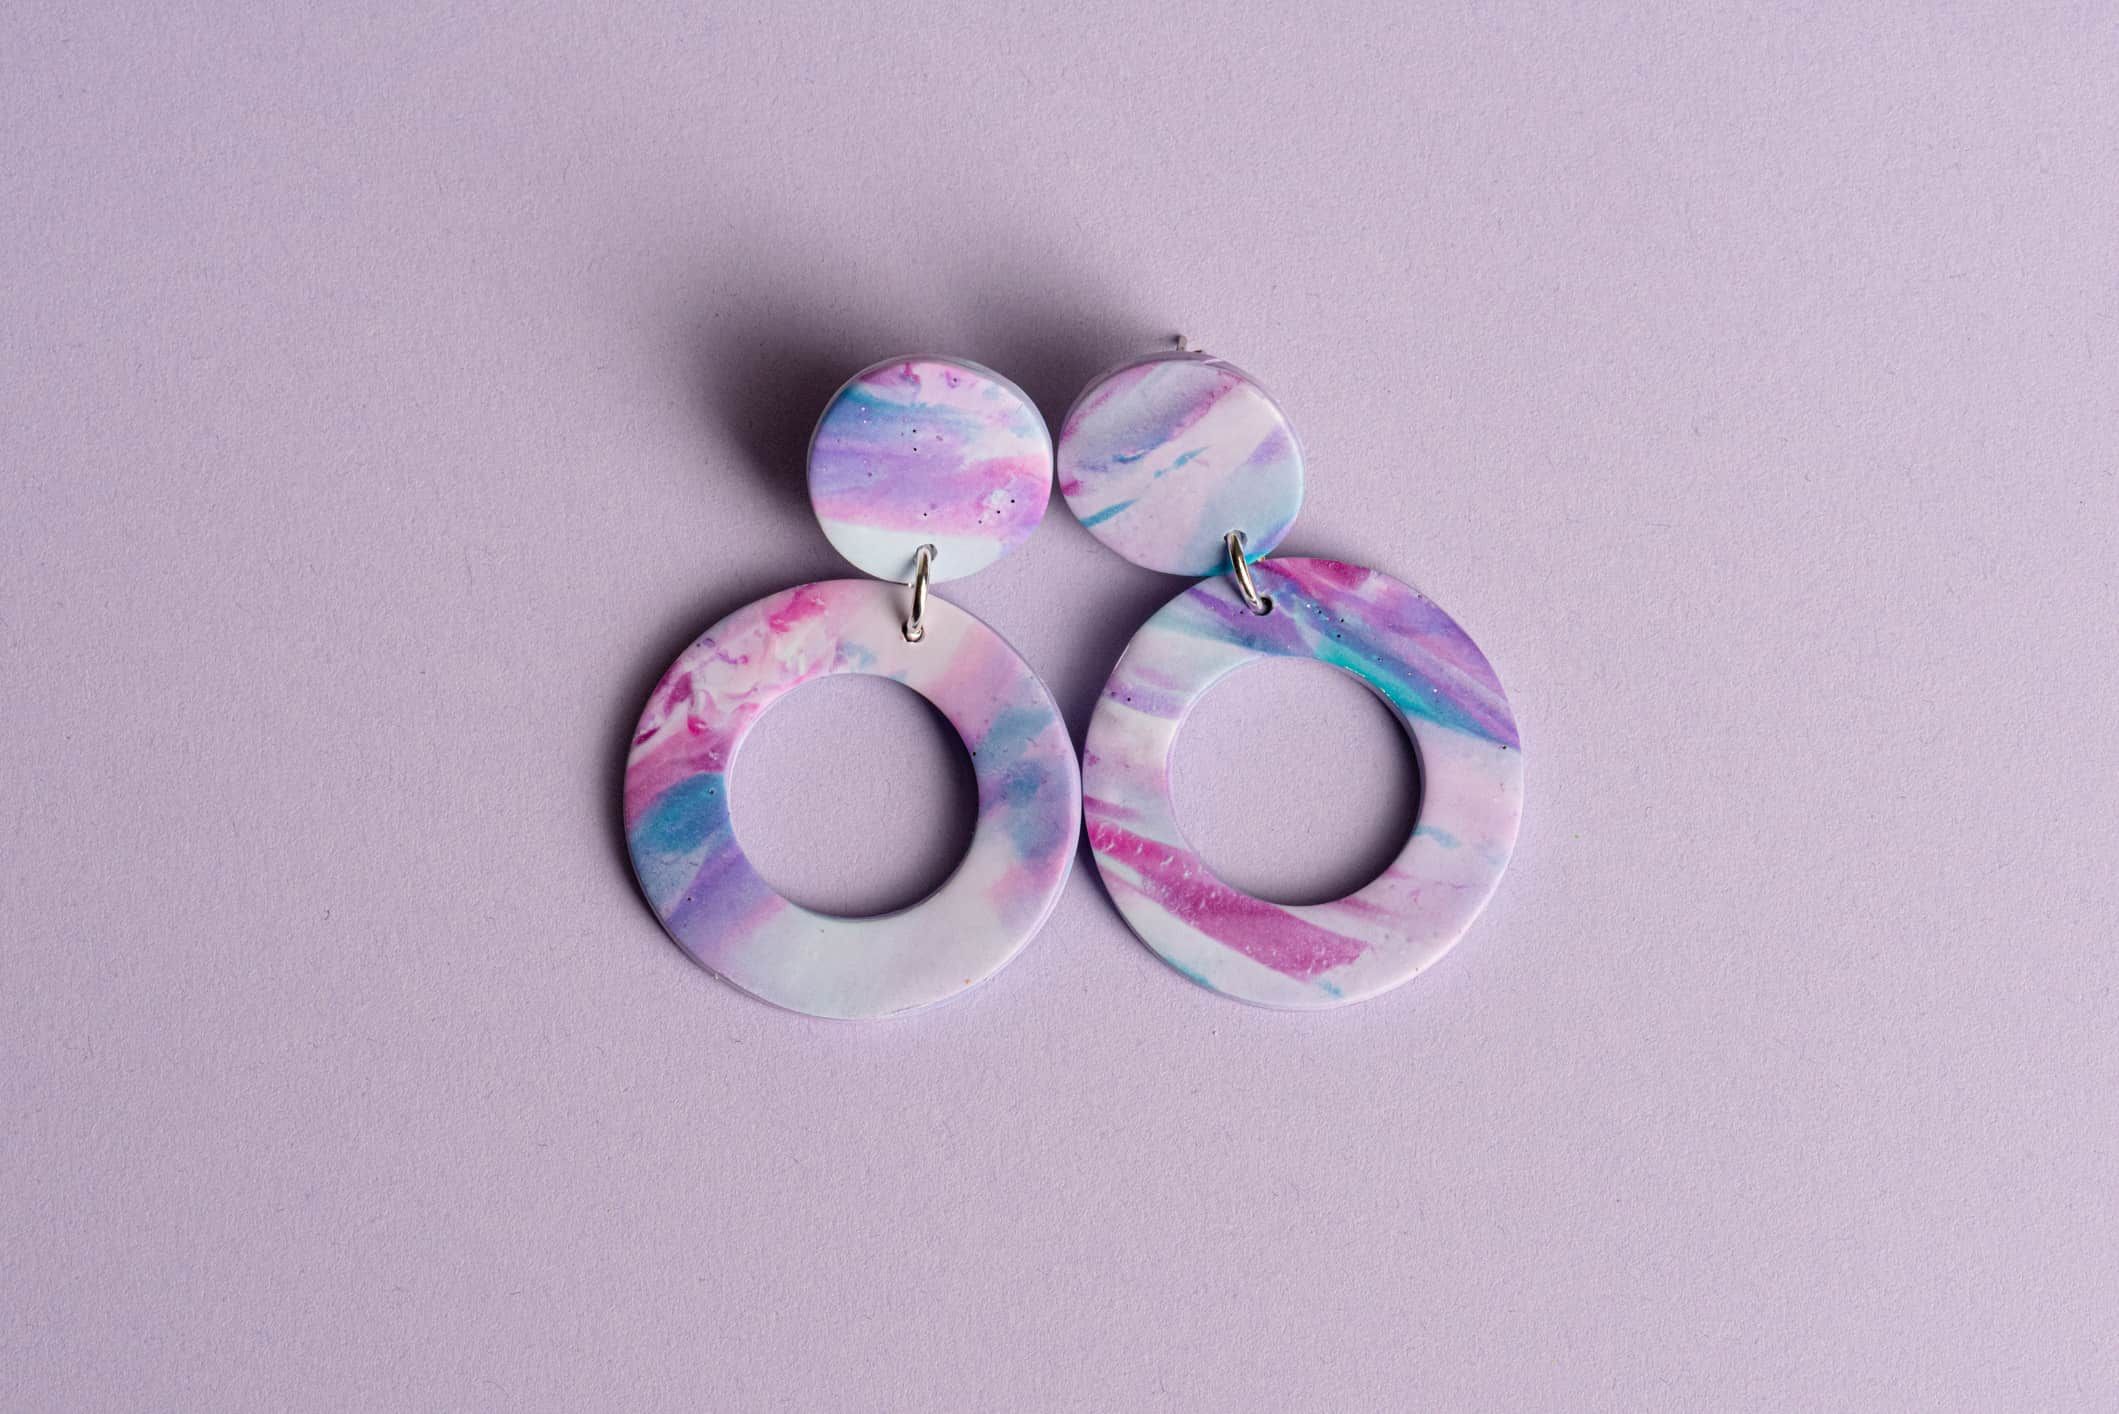
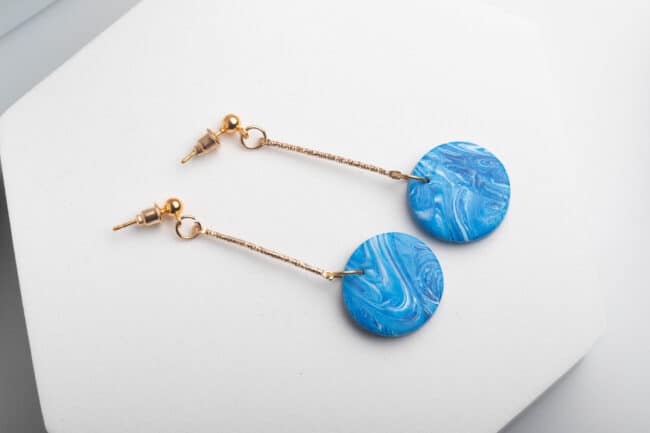
Marbling Patterns in Clay
Use leftover clay pieces to create marbling patterns in clay. Add all the leftover pieces to a color base of your choice.
Twist and roll the now colored clay. Then roll the whole thing flat with an acrylic roller.
Do this as many times as you need to in order to achieve your desired marbling look.
Once you are happy with the marbling finish, select the side that looks best to use for your piece of jewelry.
Creating Surface Textures in Polymer Clay
You can use different tools to create different textures in clay – including dots/divets, and stripes. You can really play around with patterns by using different tools.
With clay texture plates that you can purchase, you just roll the clay onto the plate and remove the plate. Textured rollers are rolled across the clay to create the pattern that is on the roller.
With stamps, just gently press the stamp into the top of the clay and repeat until you have all the shapes in the clay that you want.
Cut Your Clay Into Shapes
Once you have your clay prepared in the colors you want to use, and have used any textures that you want to use, you are ready to cut shapes out of the clay to make your jewelry.
If you are using clay with many different colors and a pattern, seek out the best section to cut in the clay for your piece of jewelry.
Press the clay cutter down hard onto the clay, so that the piece is cut right through. You may need to twist the cutter gently.
Remove the pieces of spare clay – the clay skeleton from the cut pieces.
Take the tissue blade – or similar tool – and at a 45 degree angle wriggle the piece of clay away up off the surface you cut it on.
If you are using a stencil to cut your clay, just place the stencil on top of the piece of clay, and draw around it using an xacto knife or similar knife.
Smooth out the edges of each clay piece after cutting out.
Place the cut pieces of clay for your earrings onto a sheet of paper. Make sure that the clay pieces are completely flat. If there are any idents, ridges etc they will show after baking.
Baking Polymer Clay Pieces
Clay brands all differ in the recommended baking time. Sculpey for instance requires a temperature of 275 degrees and 30 minutes baking time.
Many experts however agree that a good rule of thumb is more than 30 minutes – more like 45 minutes to an hour.
You can use your kitchen oven, or even a tabletop oven. You must maintain the same temperate the whole time you are baking. Therefore do not place clay into the oven while it is heating up.
The best way to bake your clay pieces is to use a tile. Place a piece of parchment paper on top of the tile. Place your clay pieces onto that piece of paper. Then place another piece of parchment paper on the top of that. Finish off with another tile. You can also use cardboard instead of tiles.
By using the paper you are avoiding the shiny look to your clay pieces that the tile may give pass to the clay.
After you remove from the oven allow to cool. Place some books or a plant or something on top of the tiles, paper and clay pieces. This will help eliminate bubbles. Cooling can take around 15-30 minutes or so.
If the clay is baked correctly it should be sturdy and strong and bendable. It should not snap and/or crack.
Sanding Polymer Clay Pieces
There are a couple of different ways to sand pieces.
You can use something like a Stylo Dremel, or you can hand sand the pieces of cut and baked clay.
To Hand Sand Polymer Clay
Using Lower grit sanding paper, a Sanding sponge or a nail file sand down all the excess clay. Don’t sand down the back of the piece of jewelry unless there are blobs etc that require sanding.
If as you sand there are white castings on the pieces this means there is dust inside, so use a higher grit sanding paper to smooth that out.
Try to sand a flat surface and a flat edge on each piece. If there are little grooves, angles or crevices you can get inside them easily with a nail file to smooth and sand.
Place the freshly sanded pieces into a bowl of water with a couple of squirts of dish soap, or you can use a soft brush.
Sand Polymer Clay with a Dremel
Wear a face mask with a dust filler, an eye shield, and also tie back your hair if you have long hair.
Choose the correct sanding piece for the Dremel. A Dremel felted cotton tip is good to use for most clay, or you can use one of the many sanding tips that the Dremel comes with. It all depends on how hard the clay is.
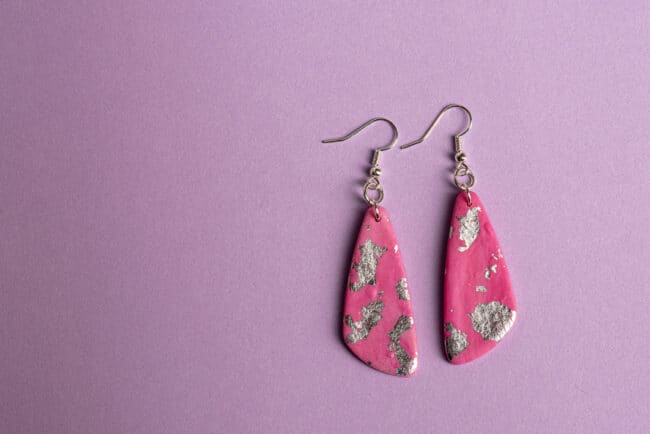
Attach Hardware to the Polymer Clay
If using the Dremel switch out the drilling bit.
Use grid paper to mark where the holes should go. There are some grid post it notes that are perfect for this.
Place the grid paper and your earring piece on top of a scrap piece of wood. Mark where the hole should go. Set the speed to 1 or 2 on a dremel and hold the piece of clay firmly. Line up the drill bit head and then drill through to create the hole.
Flip over to the back side of the earring piece and make sure it is a nice clean hole in the back also.
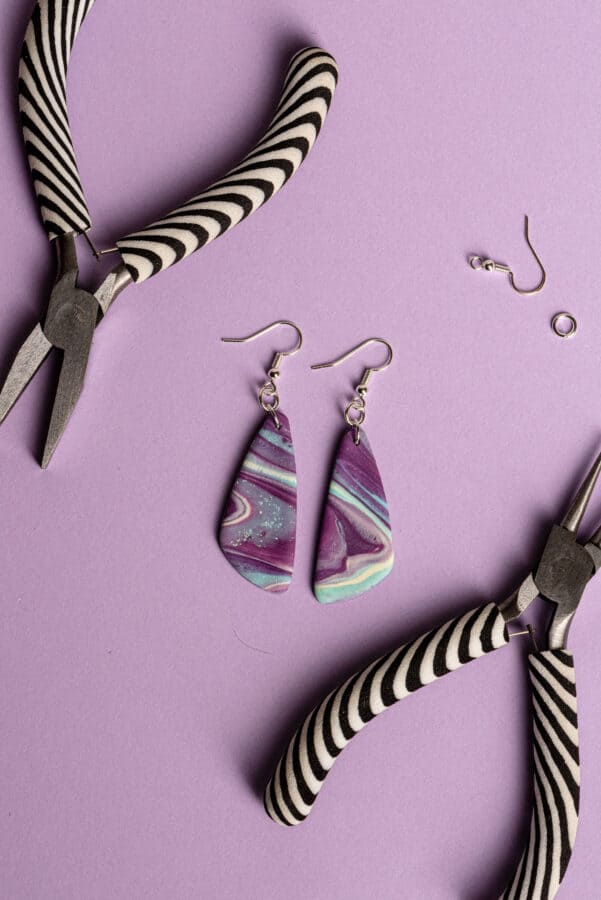
Jump Rings
If you are making earrings you will probably need to use jump rings, especially if the earrings have two pieces to them.
Jump rings come in all sizes, shape, colors and materials. Size 7 or 8 are good size jump rings for pieces such as earrings.
Place the jump rings near your earrings/jewelry to decide which ones to use if you have a selection of different colors. Find the colors or tones that match your piece of jewelry.
Slide the jump ring through the pre-drilled hole, then use two sets of pliers to twist and set the jump rings in place.
Posts/Backings
Posts for backs of earrings are glued on. It is best not to use regular glue, as body temperature when wearing the jewelry can heat up the glue and therefore make the earrings break or disintegrate.
The best glue to use for clay jewelry is liquid clay – translucent liquid Sculpey clay is recommended.
Add a generous amount of the liquid Sculpey to the back of the clay earrings. Then taking the posts set them into the liquid on the back of each earring. Then fully cover the back of the earring with the liquid clay. Wait for the liquid clay glue to dry.
You can also embed the posts into the piece of jewelry. Apply the liquid clay and add the posts as before, but instead of moving the glue all over the back after placing the posts, cut out another piece of clay the same size as the piece you are placing the posts on. Apply that piece to the back of the earring, over the post. Smooth it down so that it adheres to the back of the piece of clay. Remove any excess clay.
Put on cardstock paper again and place in the oven again for about 15-30 minutes (see the liquid clay for baking instructions). Then bake.
How to Care for and Clean Polymer Clay Jewelry
Don’t wear polymer clay jewelry in the shower, or swim or go to the beach in it.
Use a soft toothbrush to clean polymer clay jewelry.
If makeup or dirt gets onto your polymer clay jewelry just take it off with a damp cloth. If it is a particularly stubborn stain use a little acetone on a cotton .
Store polymer clay jewelry by hanging or storing flat, so that scratches and dents can’t appear in the clay.